")
")
Install the webserver software
When setting up a shared hosting environment, it is quite complicated to configure all services correctly and to have them work together. Fortunately, the makers of Virtualmin have provided a shell script to do this without any hassle. We can simply download and run this script to get everything done. All that remains after that is to go through a wizard for the initial configuration.
Installing Webmin/Usermin/Virtualmin.
Follow these steps to install the necessary software:
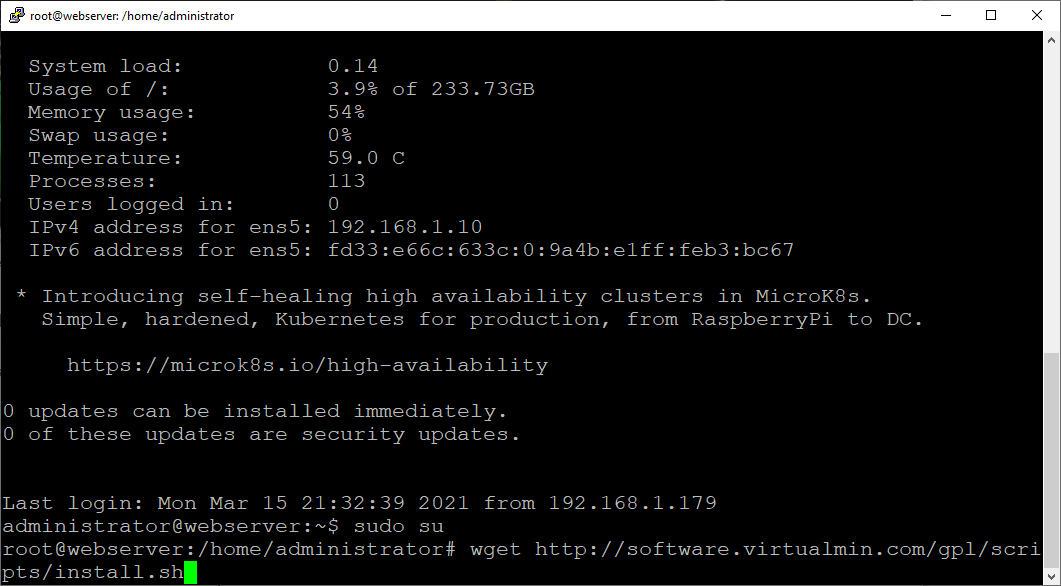
- Of course we need root privileges to install the software, so we issue the command:
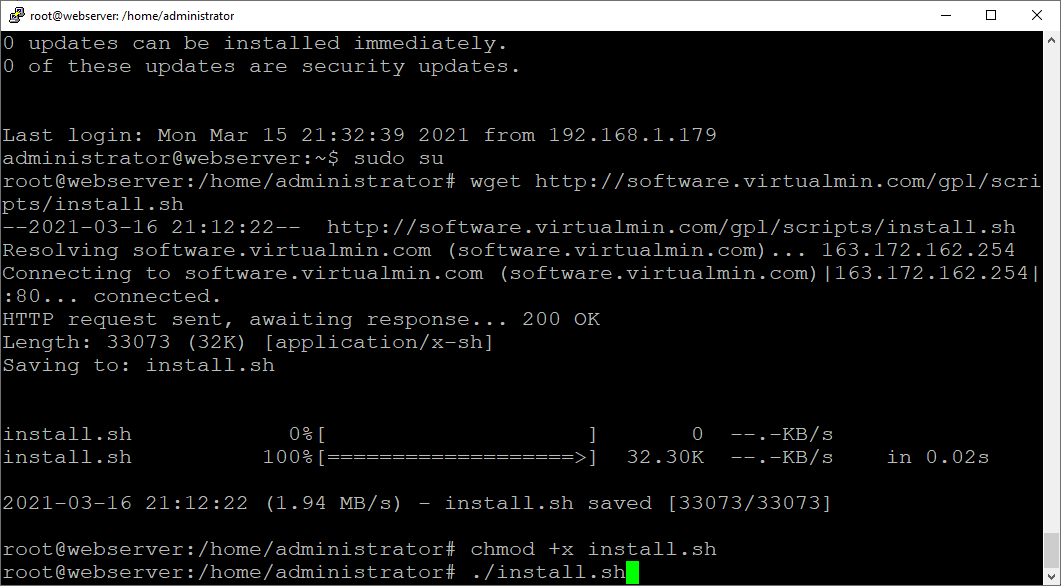
sudo su - First we download the installation script with the command:
wget http://software.virtualmin.com/gpl/scripts/install.sh - We then have to tell the Linux operating system that it is OK to run this script with the command:
chmod +x install.sh - We now start the script with the command:
./install.sh
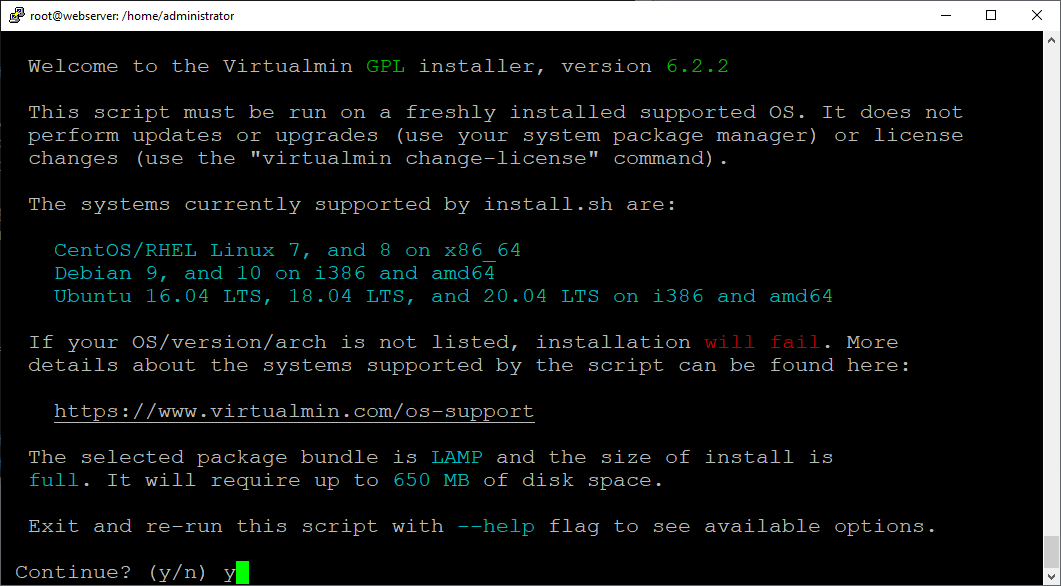
- After the script is started, a message about the script and the supported operating systems is displayed. Enter y and <Enter>. After all, we are running Ubuntu 20.04, and that is supported by the script.
- After this, the installation script continues. Depending on the speed of your server laptop and your internet line, this can take anywhere from 10 to 20 minutes.
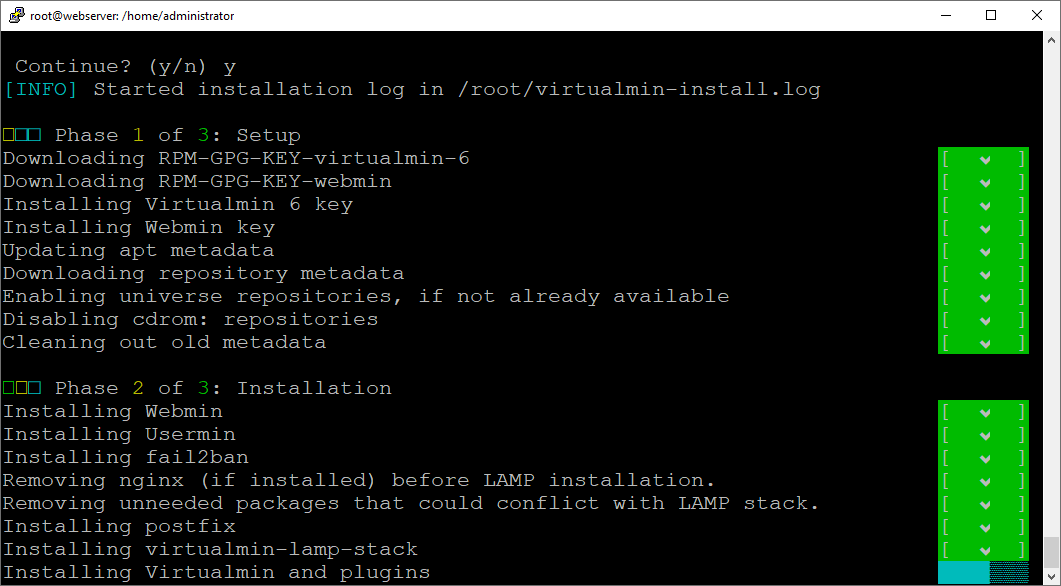
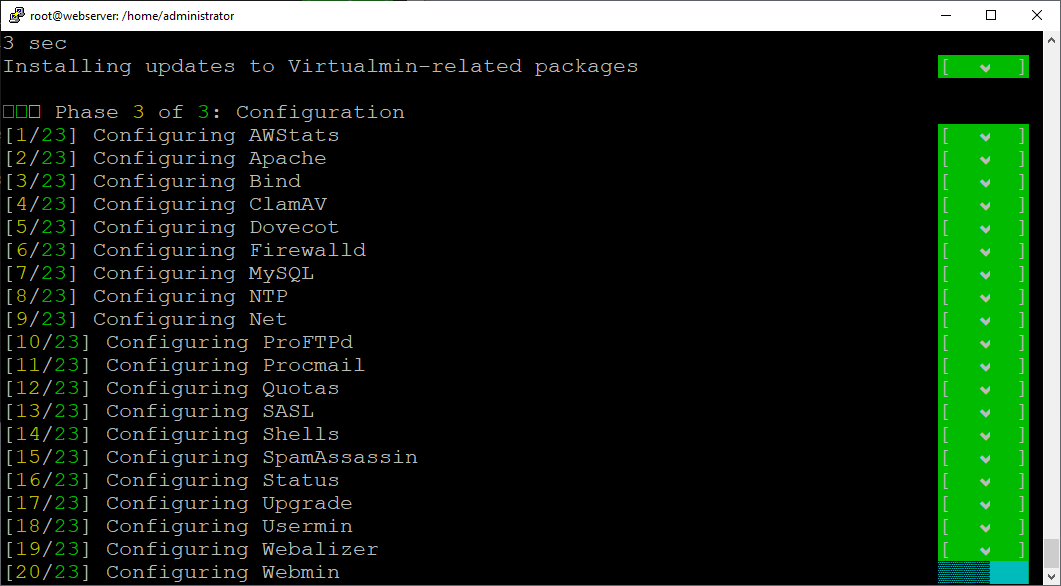
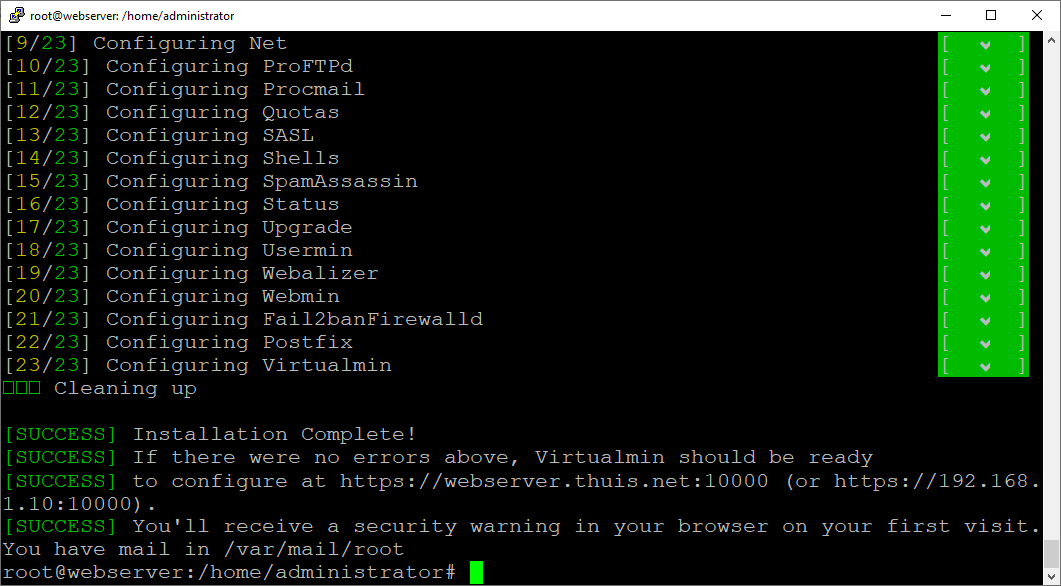
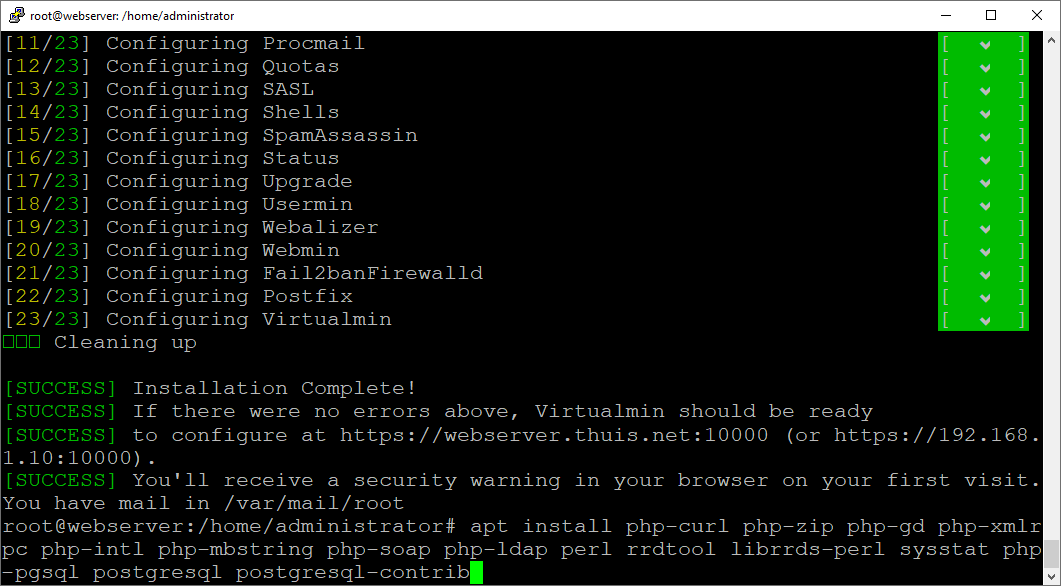
- When the installation script is finished, the message appears as in the last (right) screenshot above:
Installation complete!
If there were no errors above, Virtualmin should be ready
to configure at https://webserver.thuis.net:10000 (or https://192.168.1.10:10000).
You'll receive a security warning in your browser on your first visit. - But before we start the post-installation wizard, we will first install a number of PHP modules that you will need for most websites and, if you think you will need that later, also PostgreSQL. This is done with the command:
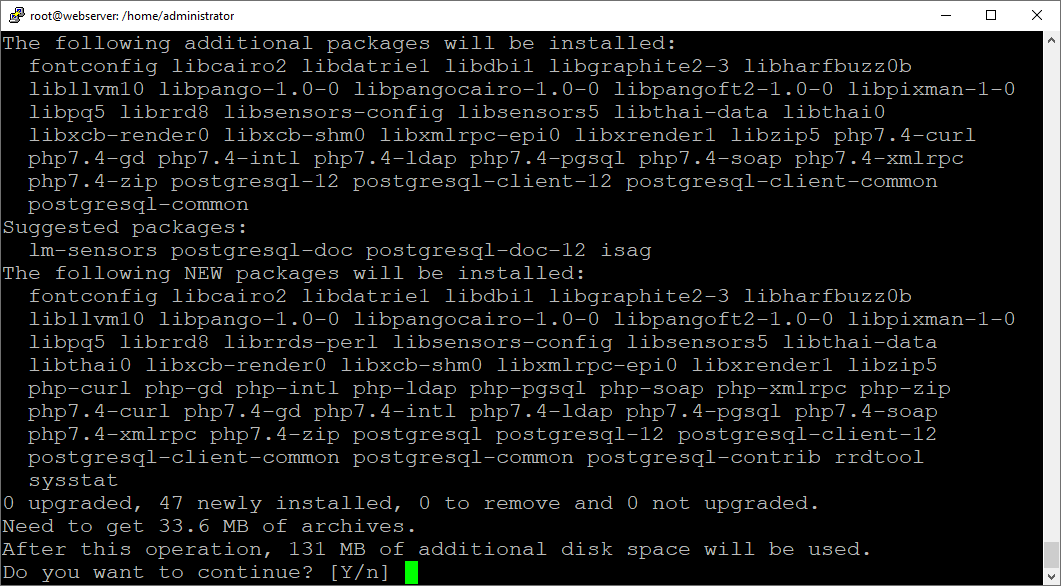
apt install php-curl php-zip php-gd php-xmlrpc php-intl php-mbstring php-soap php-ldap perl rrdtool librrds-perl sysstat php-pgsql postgresql postgresql-contrib
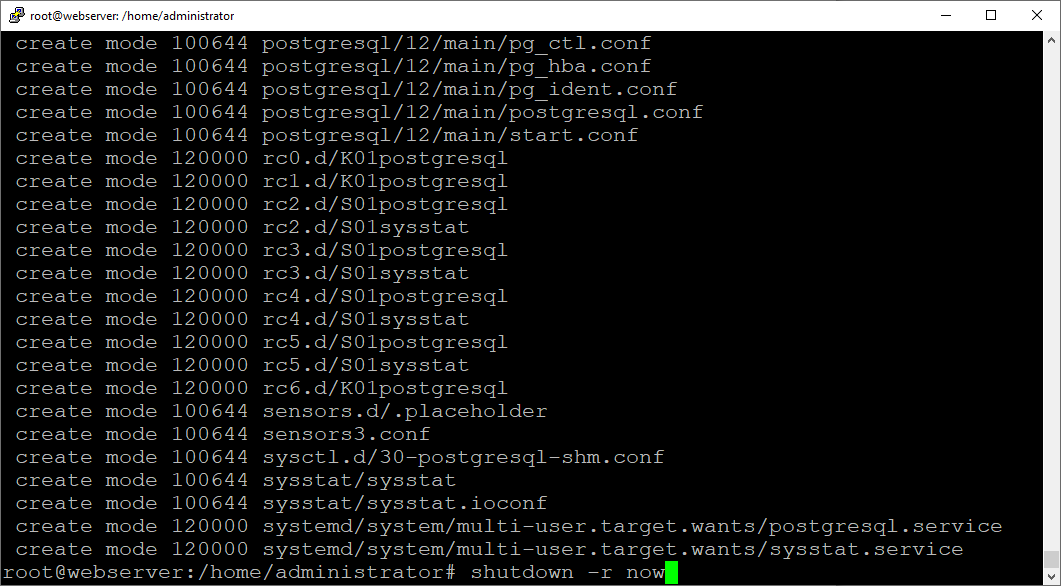
- Once that's done, we restart the server. For this we issue command:
shutdown -r now
The post-installation wizard.
After the server has restarted we open a web browser and go to:
https://webserver.thuis.net:10000 or to https://192.168.1.10:10000
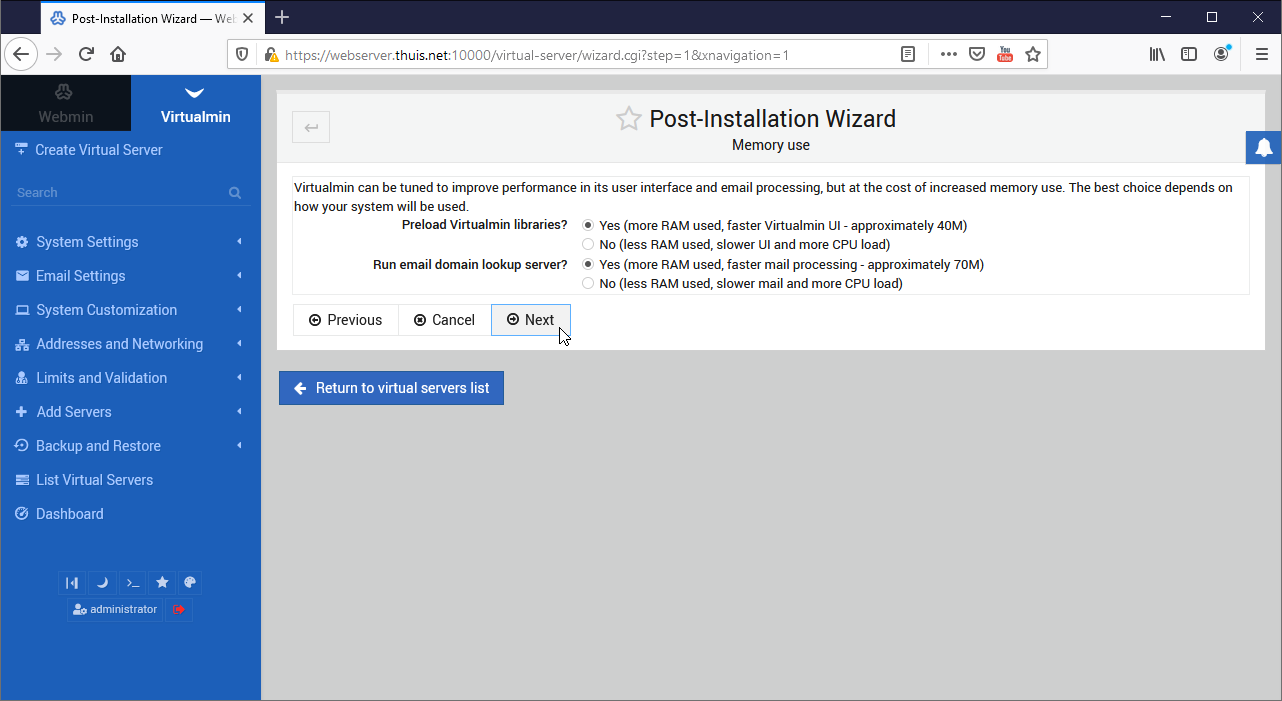
We log in here with administrator and the corresponding password. By clicking on “Next” you can now start the “Post-Installation Wizard” where you have to answer a number of questions and always go to the next question with “Next”. Click “Next” to start the Post-Installation Wizard and provide the following answers:
- “Preload Virtualmin libraries?” Yes
- “Run email domain lookup server?” Yes
- Click “Next”.


- “Enable virus scanning with ClamAV?” Yes
- Click “Next”.
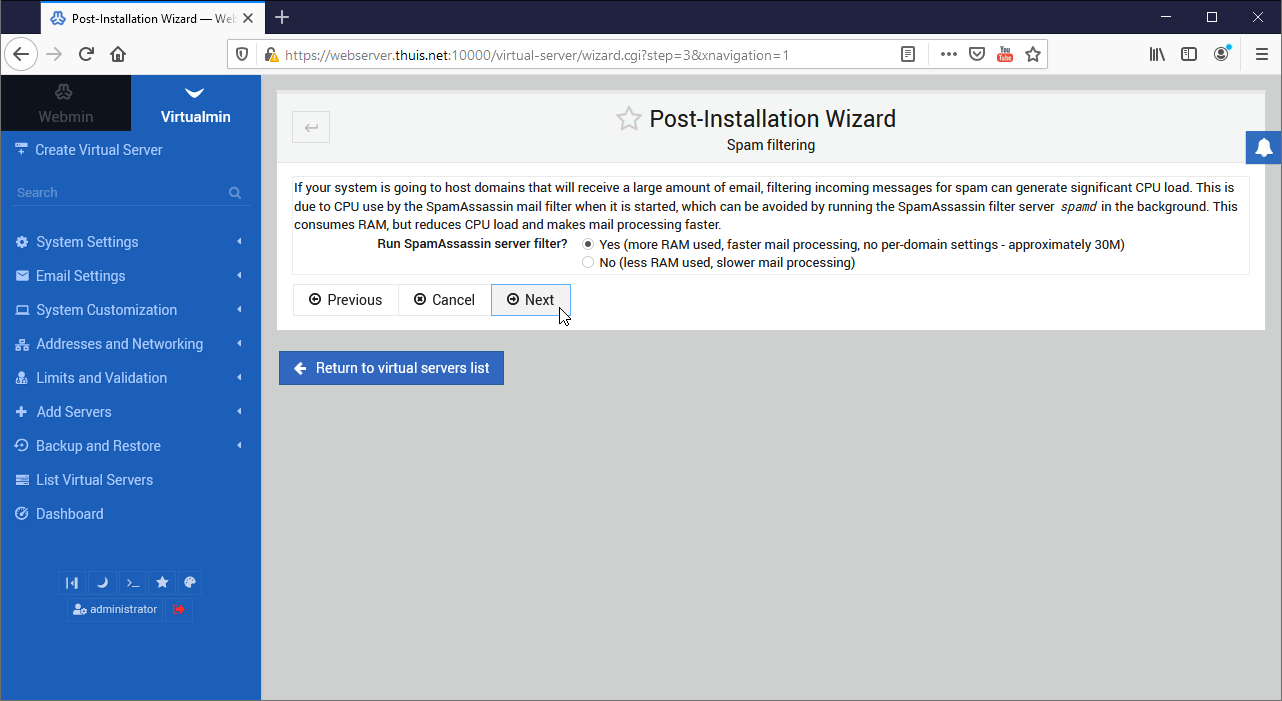
- “Run SpamAssassin server filter?” Yes
- Click “Next”.
- “Run MySQL database server?” Yes
- “Run PostgreSQL database server?” Yes
- Click “Next”.


- “Set MySQL password” Enter a password and remember it!
- Click “Next”.
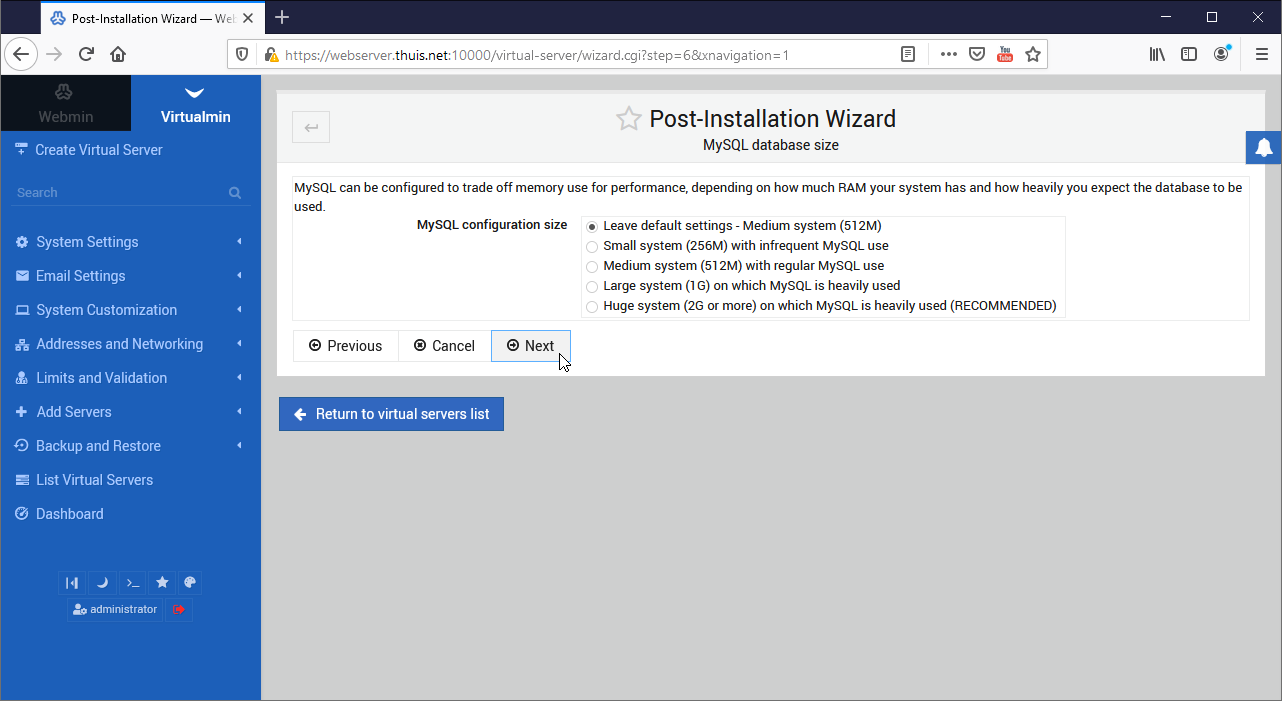
- “MySQL configuration size” Leave default settings - Medium system (512M)
- Click “Next”.
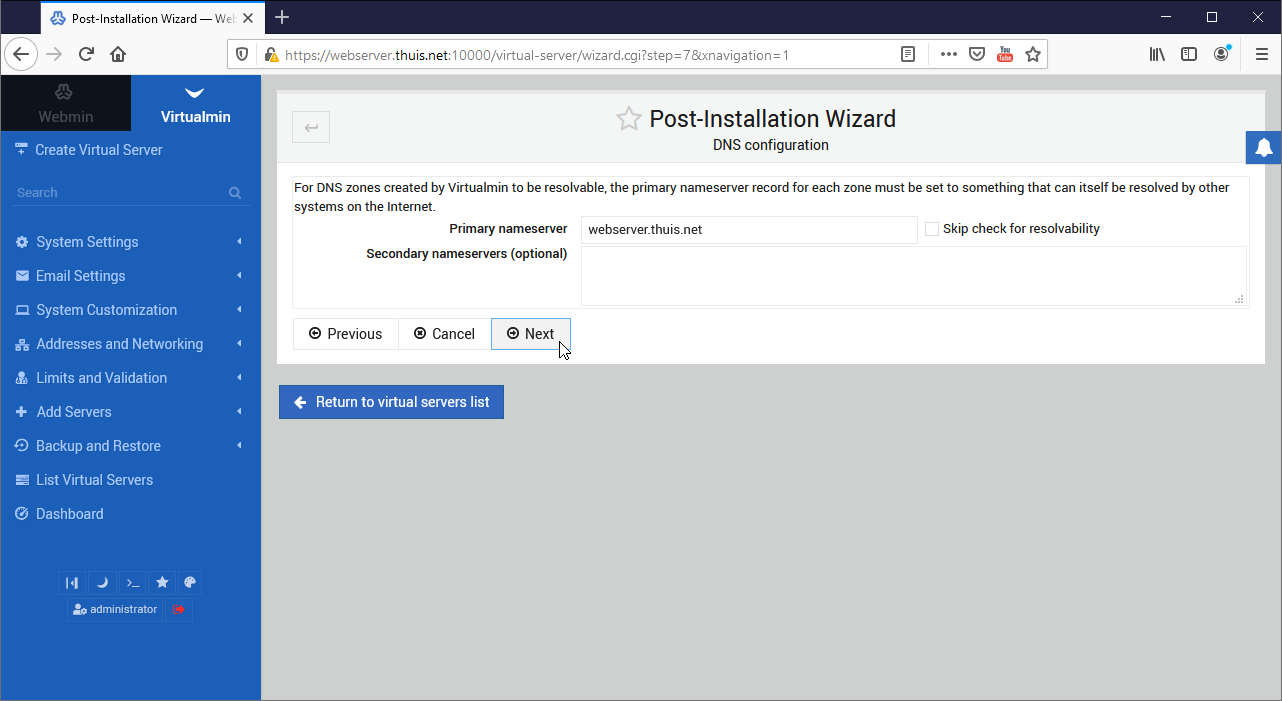
- “Primary nameserver” webserver.thuis.net (the fully qualified name of the server)
- Leave the checkbox for “Skip check for resolvability” empty.
- Click “Next”.

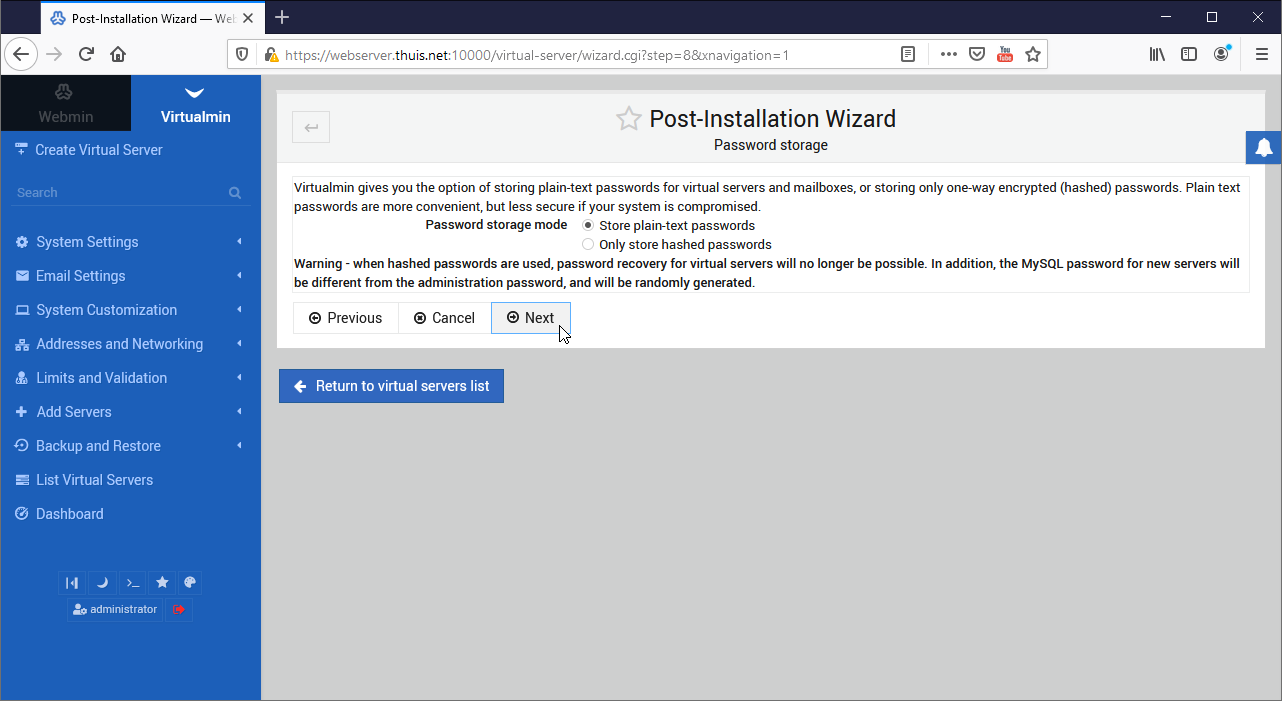
- “Password storage mode” Store plain-text passwords
- Click “Next”.
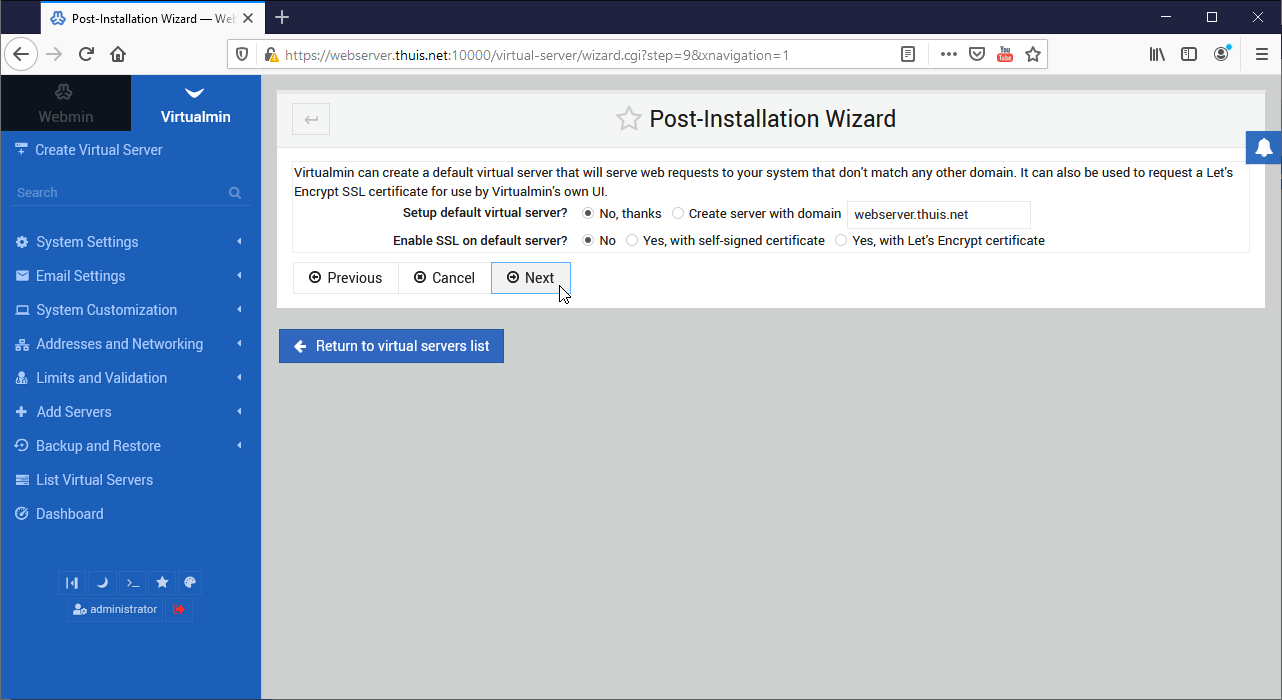
- “Setup default virtual server” No, thanks.
- “Enable SSL on default server” No.
- Click “Next”.
- In the screen that appears now shows the message:
“Virtualmin post-installation configuration is now complete”.
Click “Next” again.

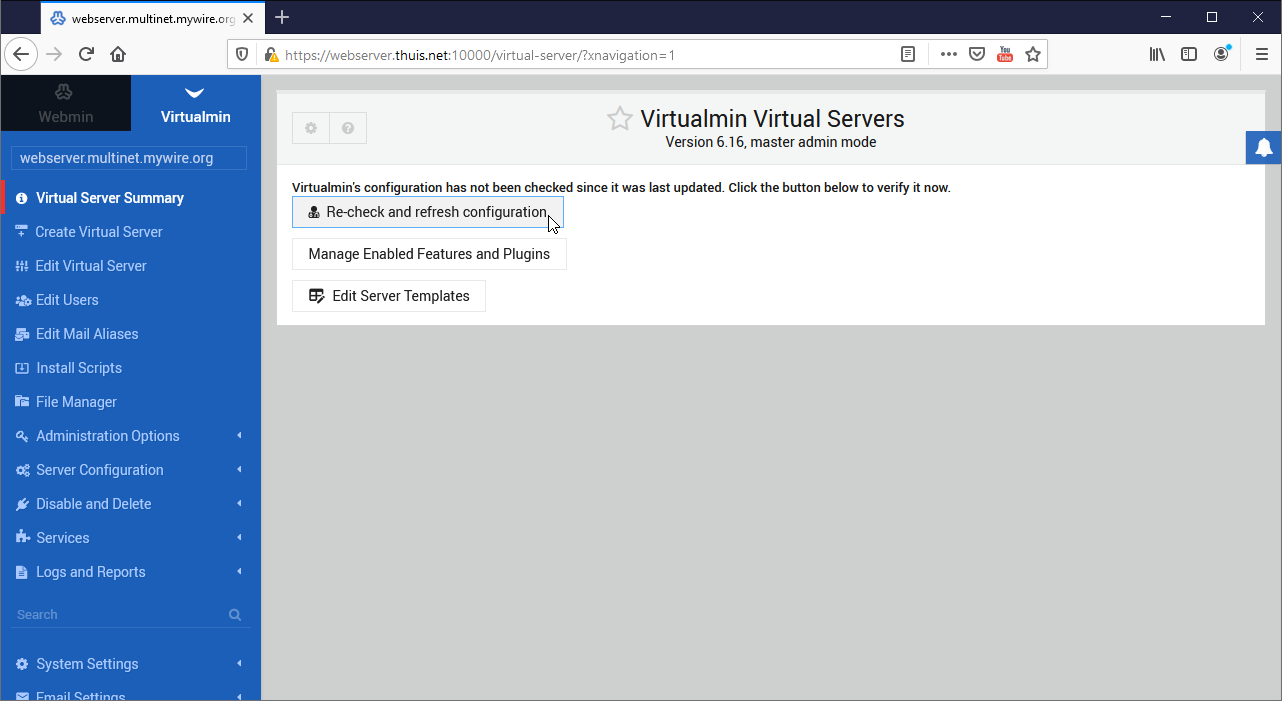
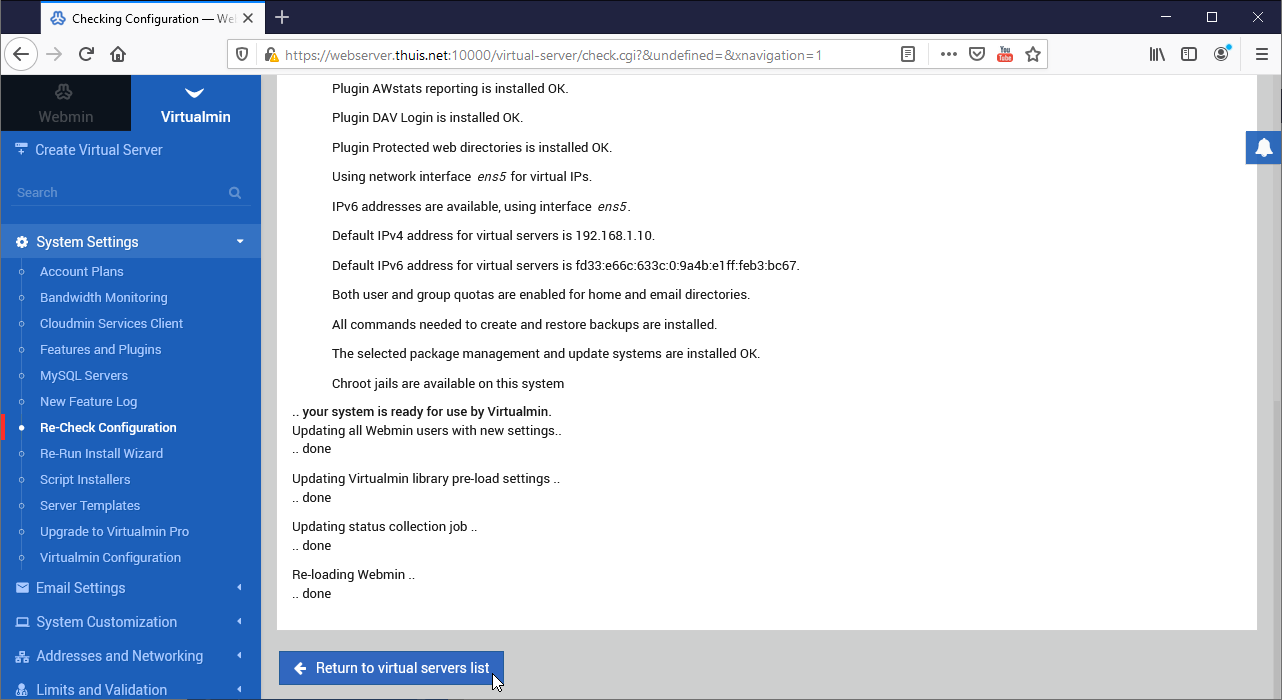
- Click “Re-check and refresh configuration”.
Now it will be checked if everything is configured correctly.
Somewhere in the result screen you should see “... your system is ready for use by Virtualmin”. - Click “Return to virtual servers list”.
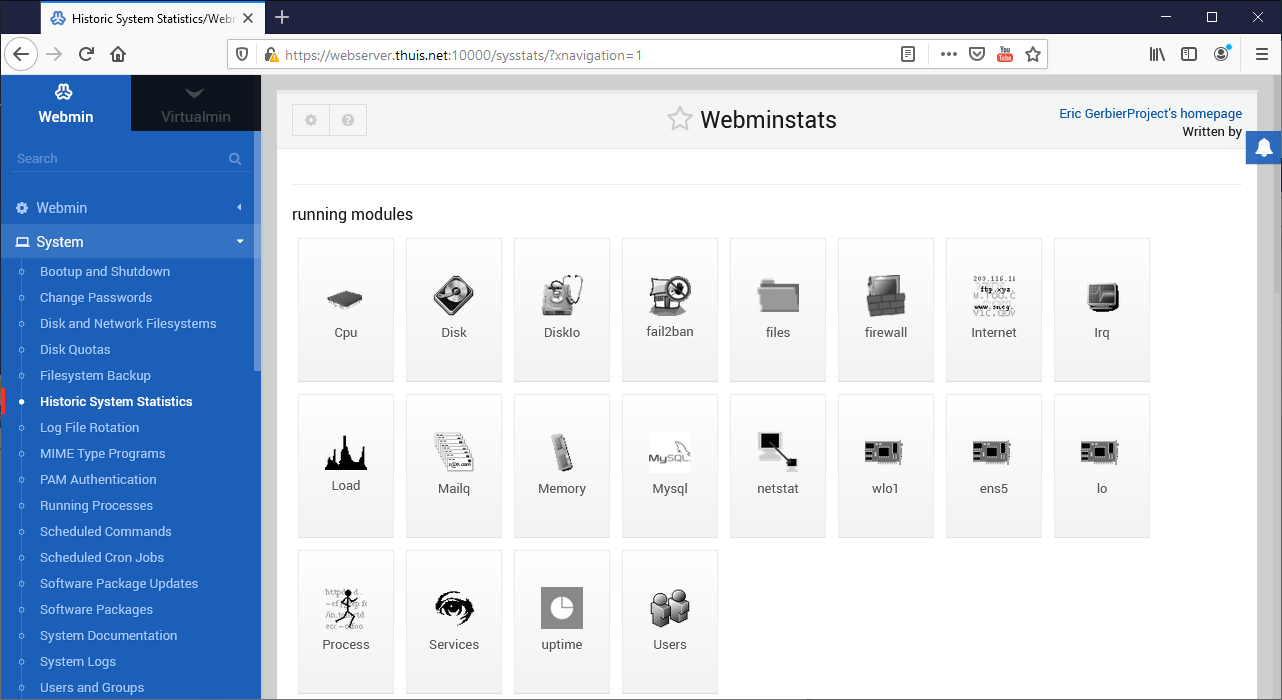
Install Webminstats.
Webminstats is an extra module that you can install in Webmin, which gives some extra statistics about the server. You don't necessarily need this module, but sometimes some extra information can be useful.
- Download the .tgz file of the latest version of webminstats from:
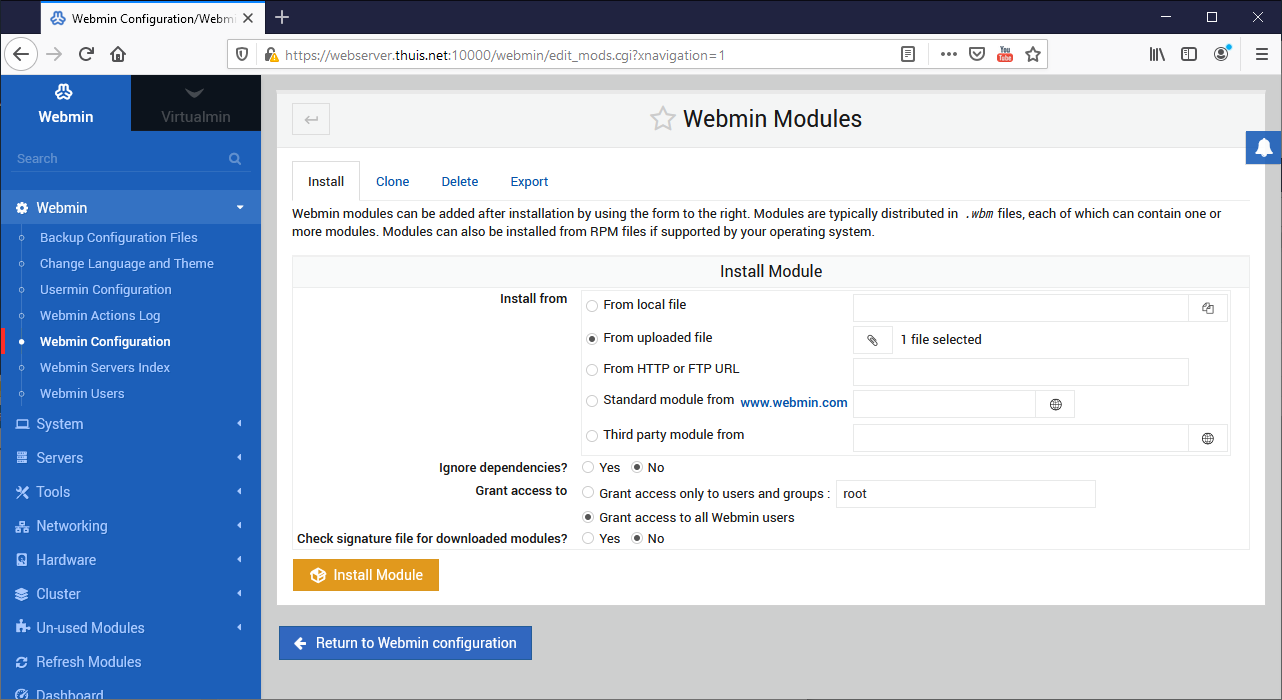
https://sourceforge.net/projects/webminstats/files/Sysstats/ - To install this package, in the Webmin screen go to “Webmin” ==> “Webmin Configuration” and click on the "Webmin Modules" tile.
- Under “Install from”, select the radio button “From uploaded file”, click on the paperclip behind it and select the .tgz file you just downloaded.
- At “Grant access to”, select the radio button for “Grant access for all webmin users” and click on the “Install Module” button.
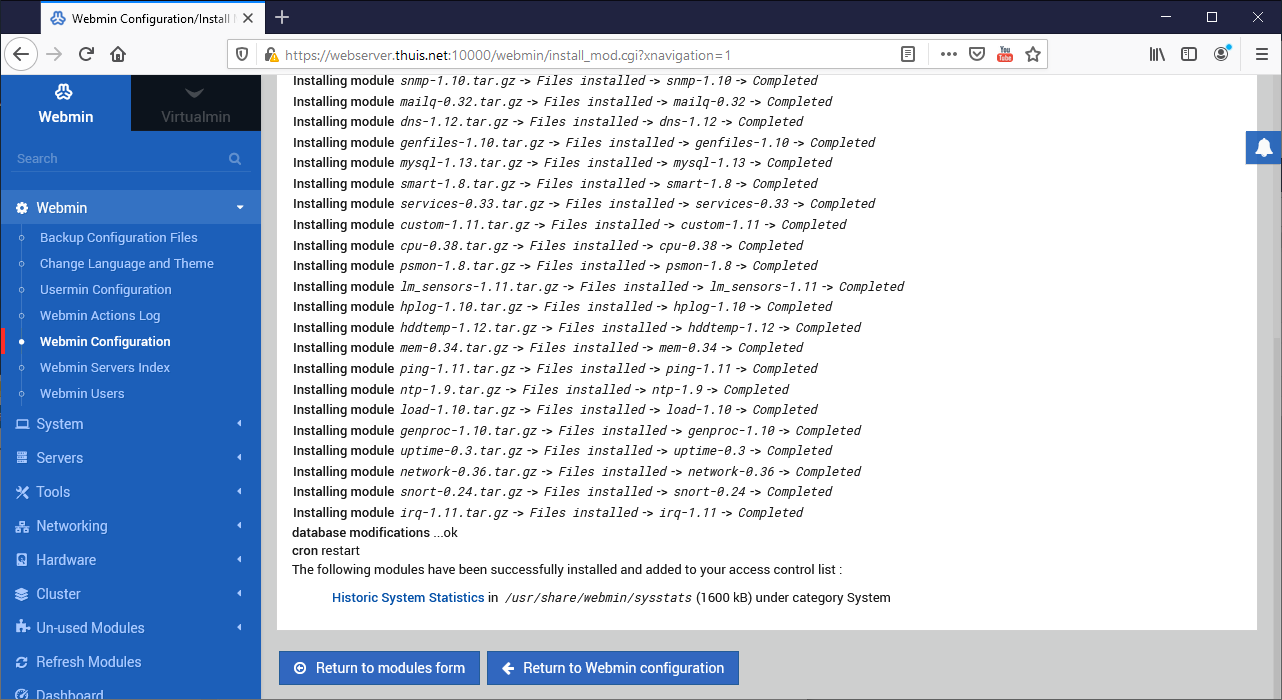
- After installation is completed, the module will appear as a new menu option in the Webmin screen as “System” ==> “Historic System Statistics”.
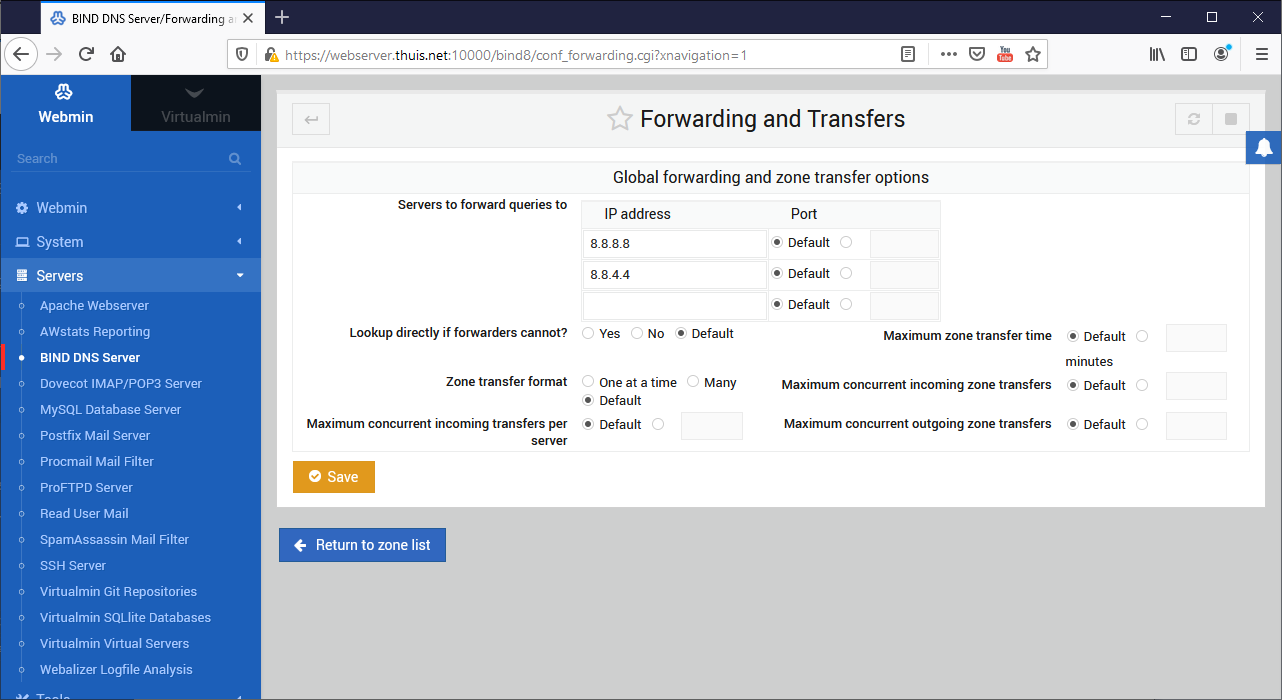
Forwarders for the BIND DNS Server.
The web server that we have now set up has its own DNS server for “own use”. Of course, this own DNS server only knows something about the hosts that are configured on its own server. To ensure that it can also find other domains, we have to configure so-called “DNS Forwarders”. These are other DNS servers that our DNS server can query for things that it does not know itself.
- In the Webmin screen go to “Servers” == & gt; “BIND DNS Server” and click on the “Forwarding and Transfers” tile.
- At “Servers to forward queries to” enter the following IP addresses:
8.8.8.8 and 8.8.4.4
These are the Google DNS servers. - Click on the “Save” button.
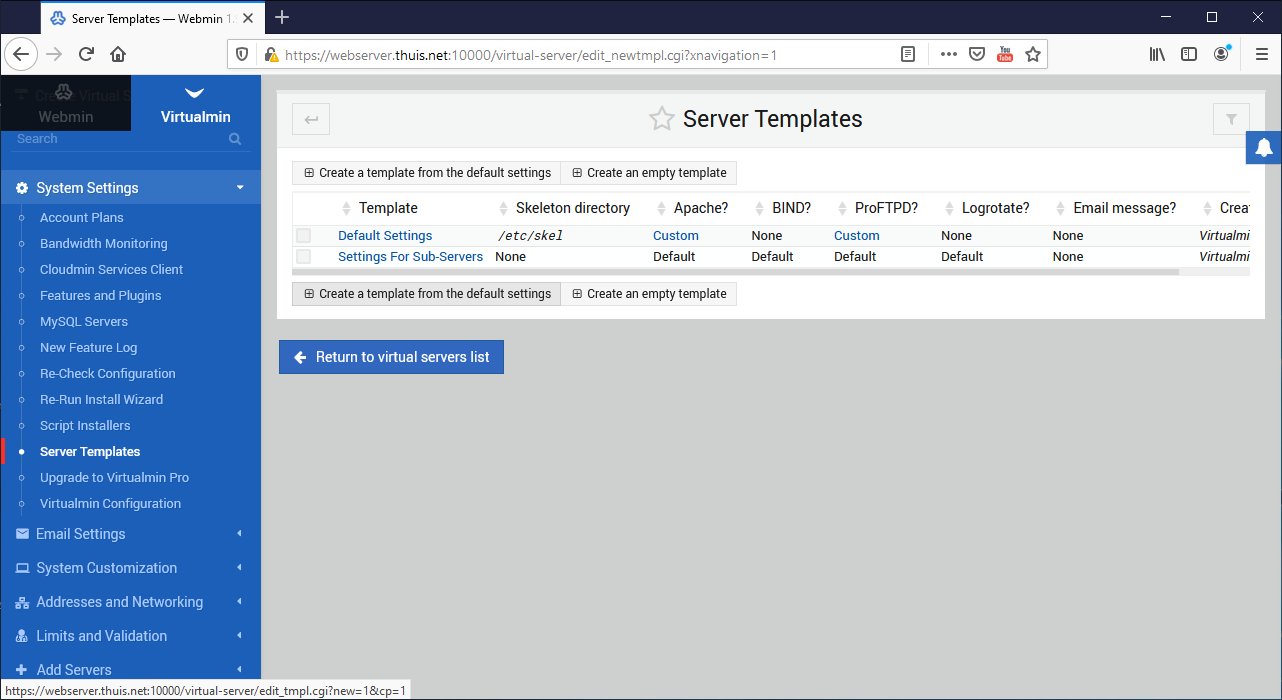
Server Templates and Account Plans for virtual hosts.
The virtual hosts that you can create for shared web hosting are created on the basis of “Server Templates” and “Account Plans”. The Server Templates contain a blueprint of how such a virtual host is set up and configured, while Account Plans specify what the administrator of a virtual host are allowed to do and how many resources he may use.
Server Template.
The server template determines how a virtual host is “assembled” when we create it. You can create different Server Templates for different types of websites. Think e.g. of a template for a normal web server, and another template for e.g. a proxy server or a server mainly used for webmail. In any case, we are going to make a Server template for a normal web server to start with. Other Server Templates are covered in the related articles where they will be used to create special purpose virtual hosts.
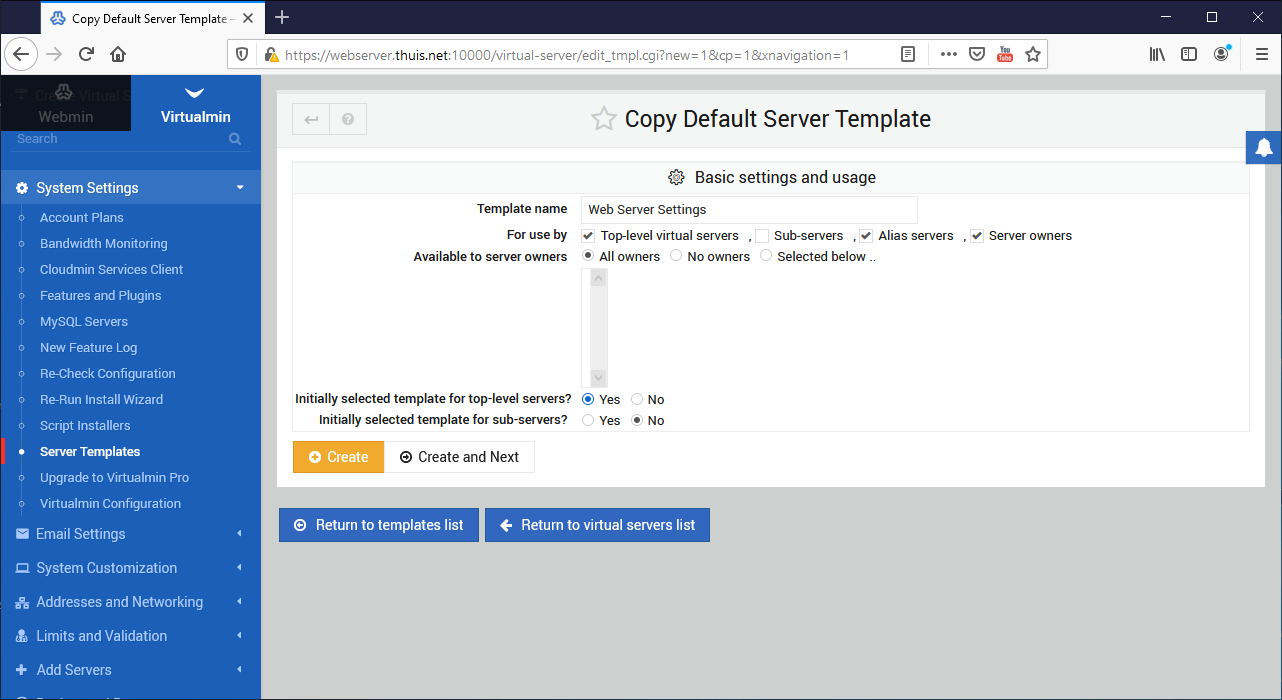
- In the Virtualmin screen go to “System Settings” ==> "Server Templates" and click "Create a template from default settings".
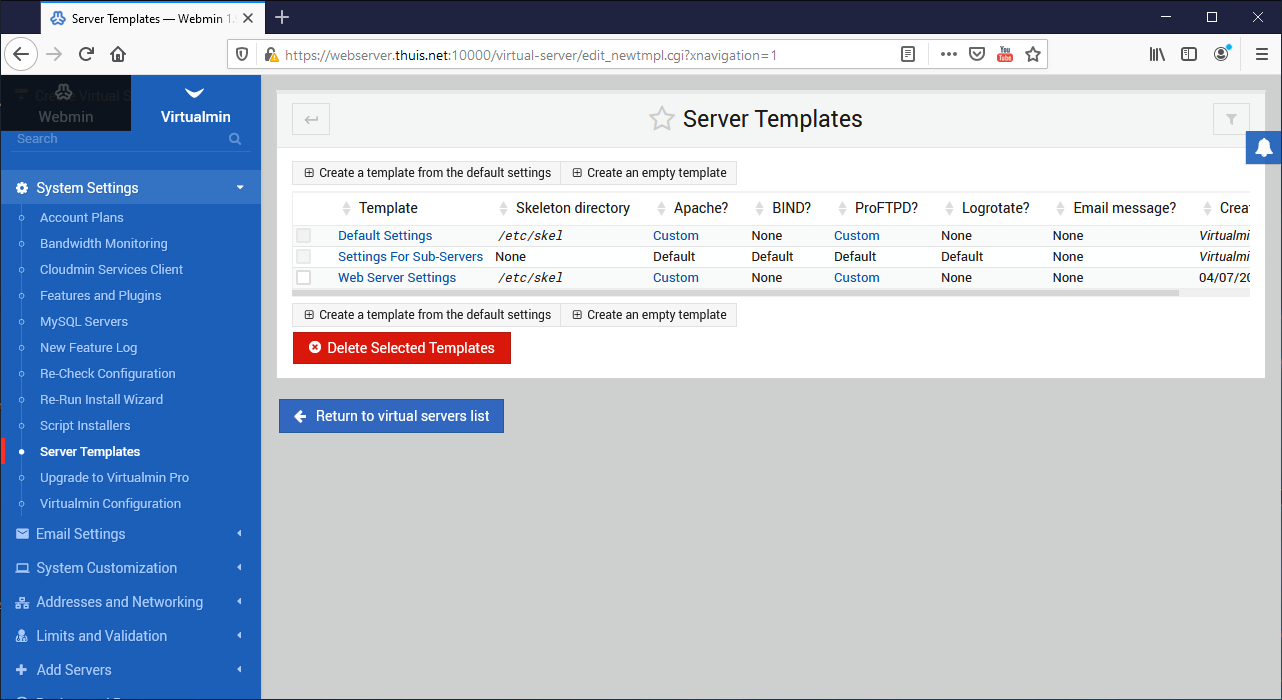
- At “Template name” enter the name “Web Server Settings”, select “Yes” at “Initially selected template for top-level servers?” and click on “Create”. The template “Web Server Settings” will now appear in the list.
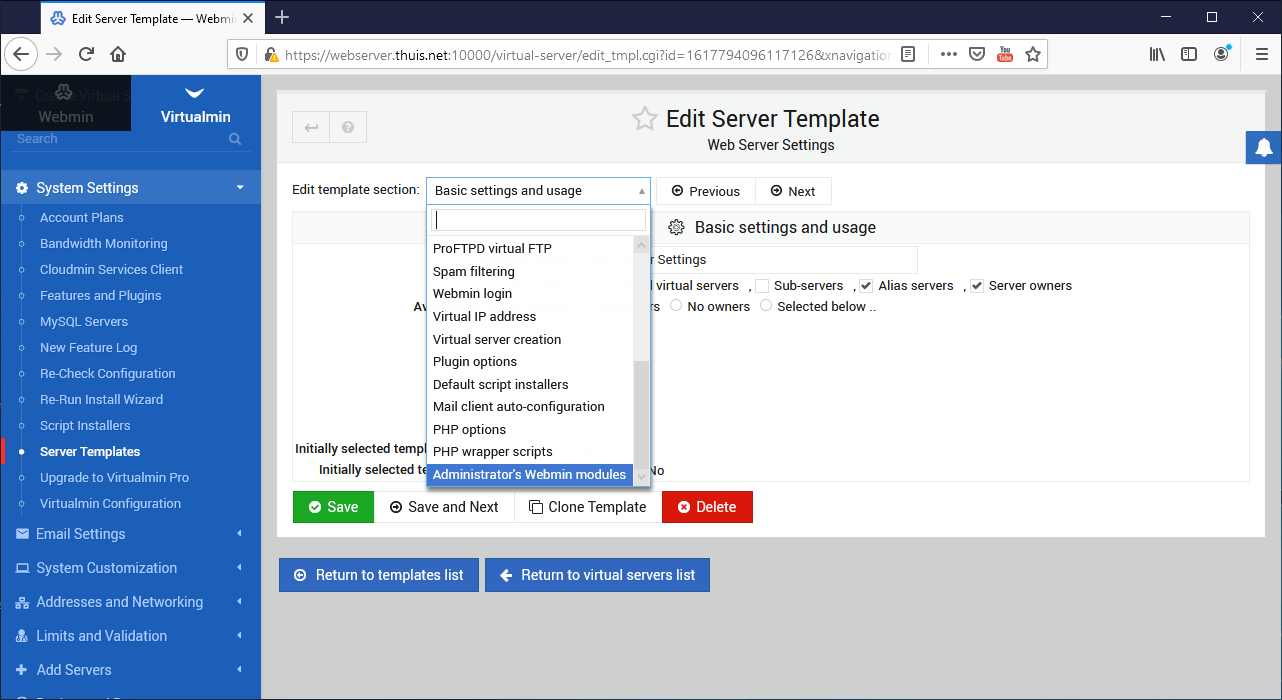
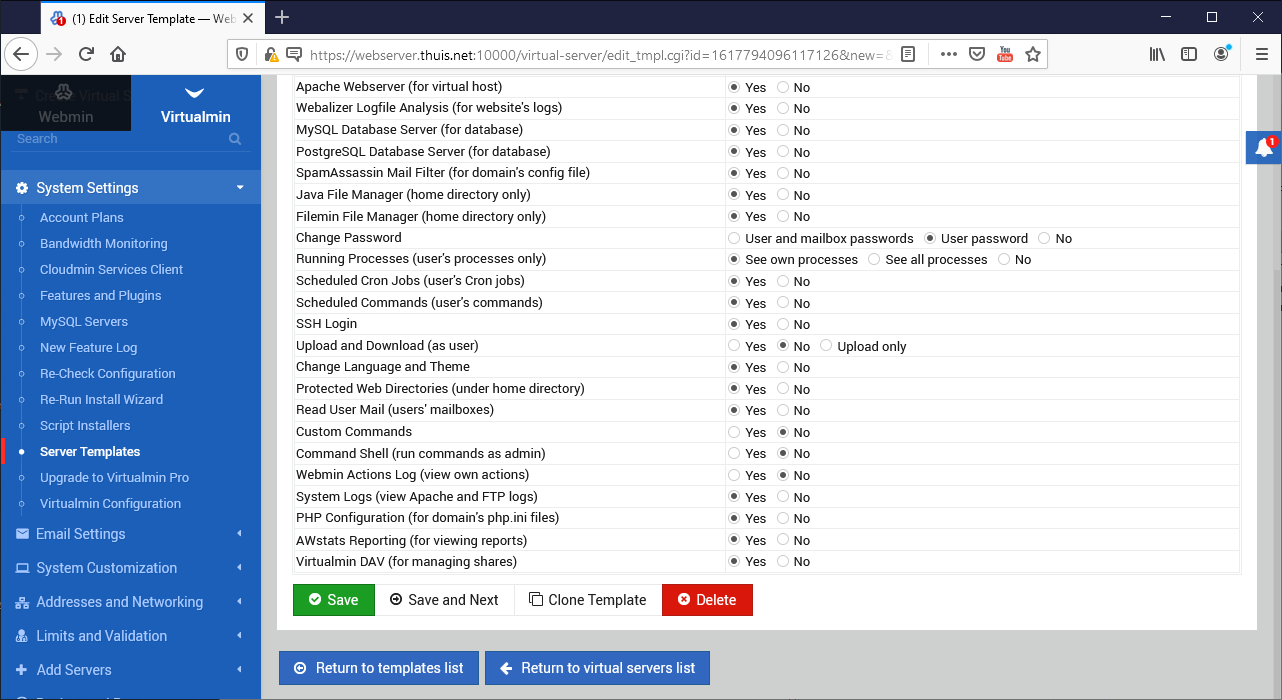
- In the Server templates list, click on “Web Server Settings” you just created and select “Administrator's Webmin Modules” in the dropdown box.
- Scroll all the way down and select “Yes” at “AWstats Reporting (for viewing reports)” and at “Virtualmin DAV (for managing shares)” and then click on “Save” again.
Account plans
An account plan specifies which options the “owner” of a virtual host has within Webmin/Virtualmin and how many resources (eg how much disk space) he can use for the virtual host. If you only want to host your own website on this server, you only have to create 1 account plan in which you allow umlimited resources. If you plan to allow others to host their site on your server, it is wise to limit the resources they are allowed to use in separate account plans. When creating the virtual host, you indicate which account plan is used. You can also decide to make different account plans for different types of virtual hosts. You can then create different account plans for websites of different sizes, but e.g. also several separate account plans for webmail servers of different sizes. It should be noted here that hosting a mail server at home has a number of extra hurdles to overcome, but that will be explained in separate articles.
Anyway, we will start by creating an “Unlimited Webserver Plan” for our own use and, if you wish, a number of plans for websites of different sizes.
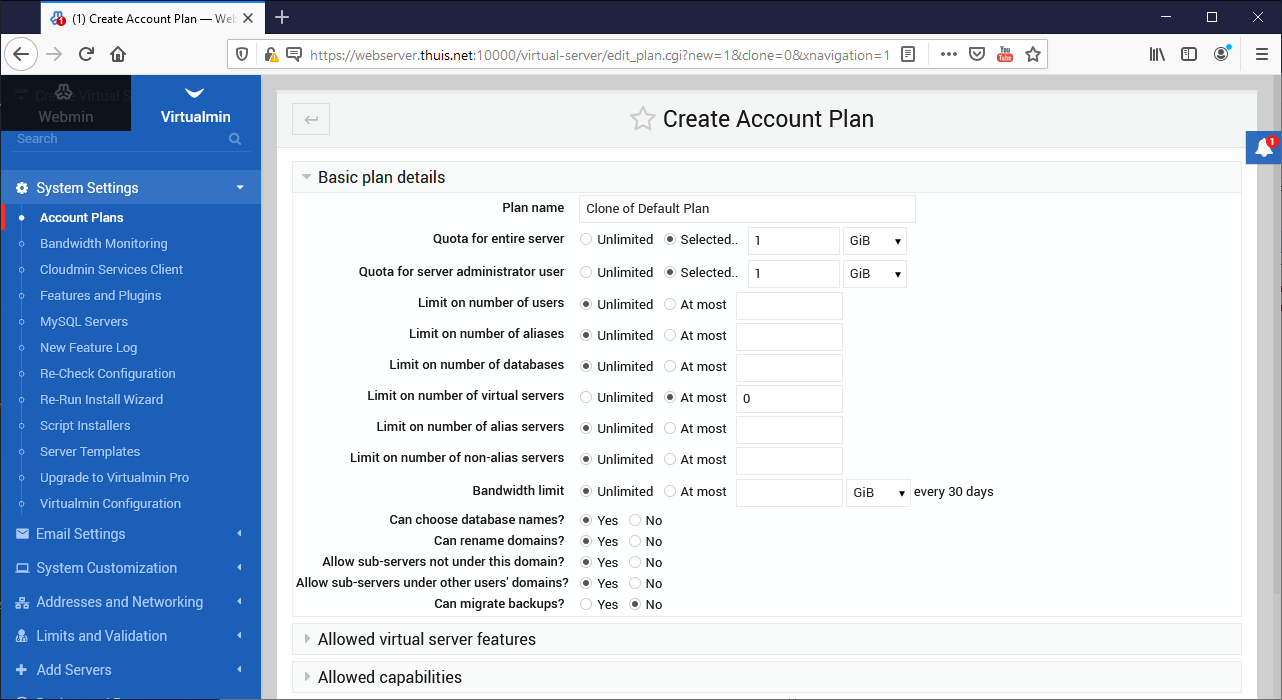
- In the Virtualmin screen go to “System Settings” ==> "Account Plans", click on the "Default Plan", then the "Clone" button.
- Under “Basic plan details”, make the following changes:
- Under “Plan name” enter: “Unlimited Webserver Plan”.
- Choose at “Quota for entire server” and at “Quota for server administrator user” for: “Unlimited”.
- At “Limit on number of virtual servers” select “Unlimited”.
- Select at “Can rename domains?” for “No”.
- Choose at “Alow sub-servers not under this domain?” for “No”.
- Select at “Allow sub-servers under other user's domains?” for “No”.

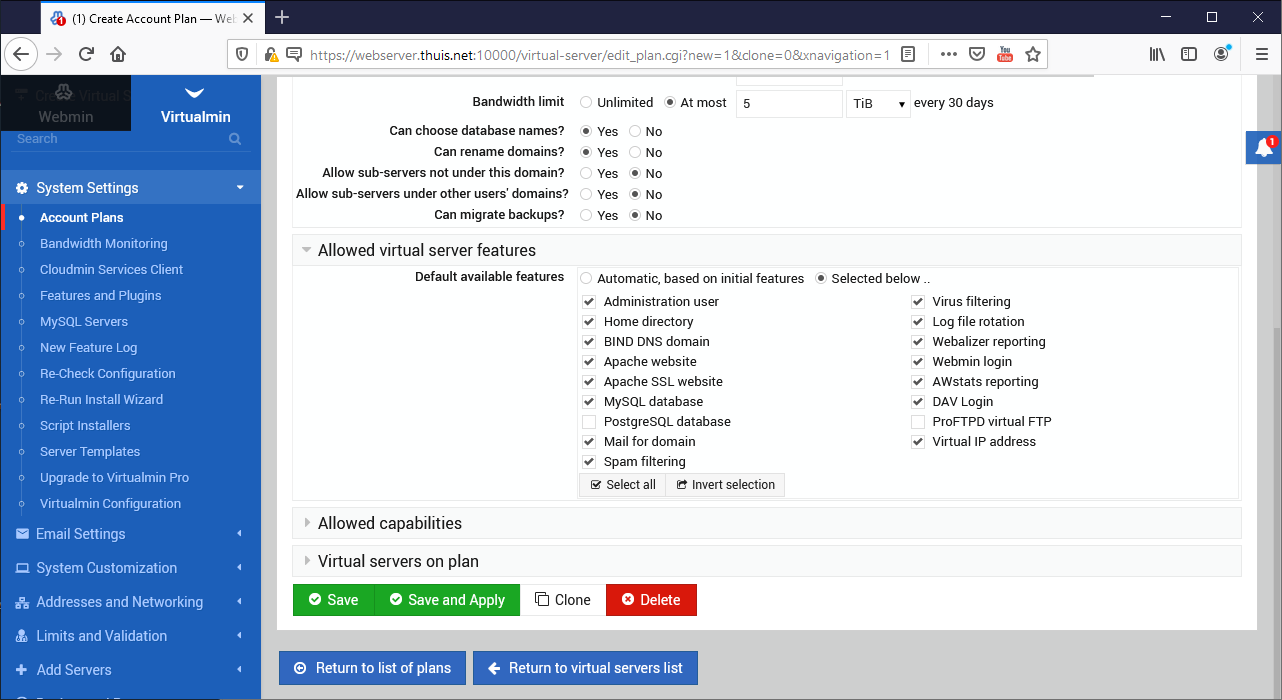
- Expand “Allowed virtual server features” and at “Default available features” choose “Selected below”.
- Activate all checkboxes below EXCEPT “ProFTPD virtual FTP” and “PostgreSQL database”. Even without activating ProFTPD virtual FTP, the "owner" of the site can still access it with FTP and in most cases you do not need PostgreSQL.
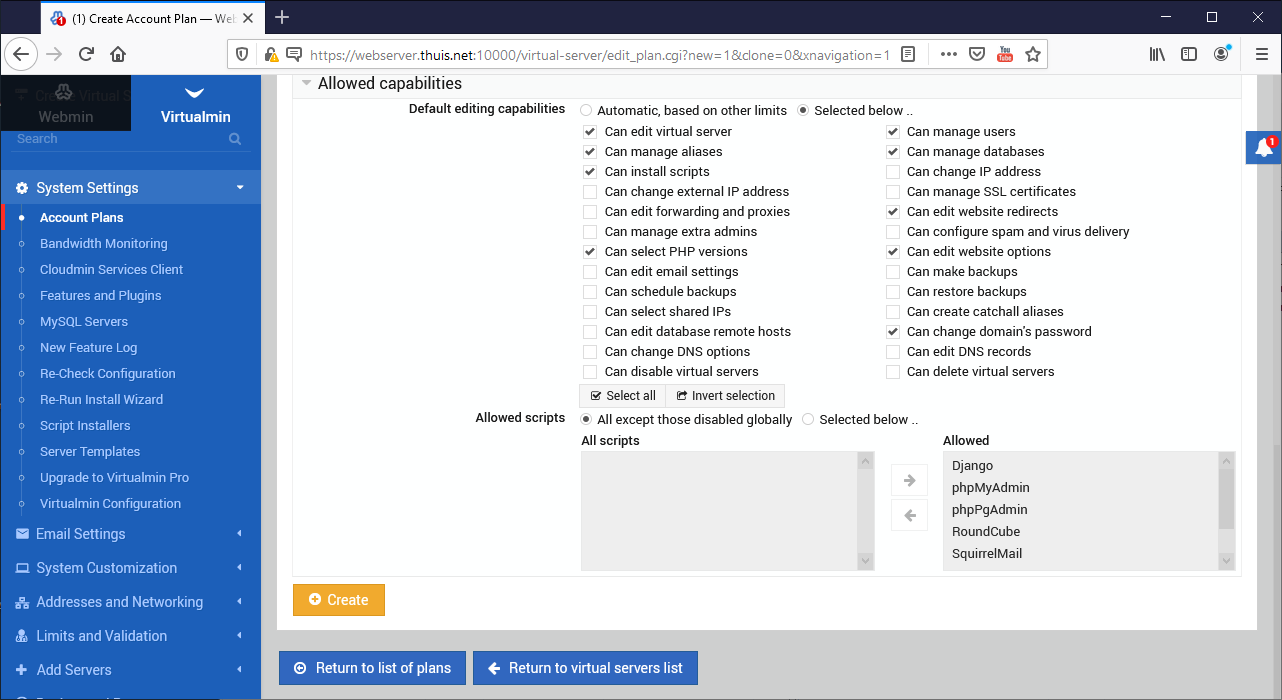
(You can always adjust this during the creation of the site, but the above will suffice in the vast majority of cases.) - Expand “Allowed capabilities” and at “Default editing capabilities” choose “Selected below ...”
- Activate the following checkboxes:
- “Can edit virtual server”.
- “Can manage aliases”.
- “Can install scripts”.
- “Can select PHP versions”.
- “Can manage users”.
- “Can manage databases”.
- “Can edit website redirects”.
- “Can edit website options”.
- “Can change domain’s password”.
- Click on the “Create” button.

You can basically create as many account plans as you want. If you also want to allow others to host their site on your server, it is wise to create other account plans in which you limit the allowed resources (disk space, bandwidth, etc.). This prevents others from using your disk space entirely for themselves or that your internet connection is congested by excessive network traffic.
As an example below we create an account 2 account plans, one for a website that uses a maximum of 1GB disk space, cannot create sub-domains, generates a maximum of 2 Terrabyte network traffic per month and where a maximum of 5 mailboxes is allowed, and one for a website that uses a maximum of 15GB disk space, can create 2 sub-domains, generates a maximum of 5 Terrabyte network traffic per month and where a maximum of 10 mailboxes are allowed.
- In the Virtualmin screen go to “System Settings” ==> "Account Plans", click on the "Unlimited Webserver Plan" we just created, then click the "Clone" button.
- Under “Basic plan details”, make the following changes:
- Under “Plan name” enter: “1GB Webserver Plan”.
- At “Quota for entire server” and at “Quota for server administrator user”, choose: “Selected”, enter “1” and choose “GiB” in the drop-down box.
- At “Limit on number of users” and “Limit on number of aliases” choose “At most” and enter in “5”.
- At “Limit on number of virtual servers” select “At most” and enter “0”.
- At “Bandwidth limit” select “At most”, enter “2” and choose “TiB” from the drop-down box.
- Click on the “Create” button.
- In the Virtualmin screen go back to “System Settings” ==> "Account Plans", click again on the "Unlimited Webserver Plan" we created earlier, then click the "Clone" button again.
- Under “Basic plan details”, make the following changes:
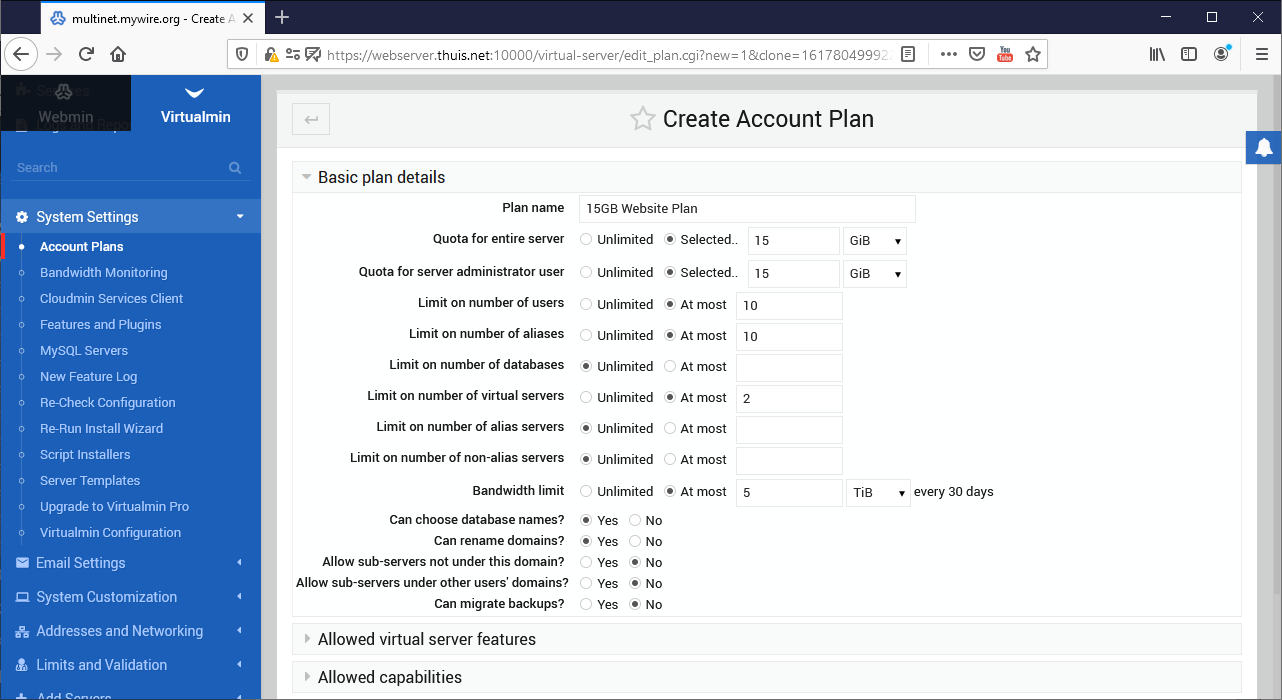
- Under “Plan name” enter: “15GB Webserver Plan”.
- At “Quota for entire server” and at “Quota for server administrator user”, select: “Selected”, enter “15” and choose “GiB” from the drop-down box.
- At “Limit on number of users” and “Limit on number of aliases” select “At most” and fill in “10”.
- At “Limit on number of virtual servers” select “At most” and enter “2”.
- At “Bandwidth limit” select “At most”, enter “5” and choose “TiB” from the drop-down box.
- Click on the “Create” button.

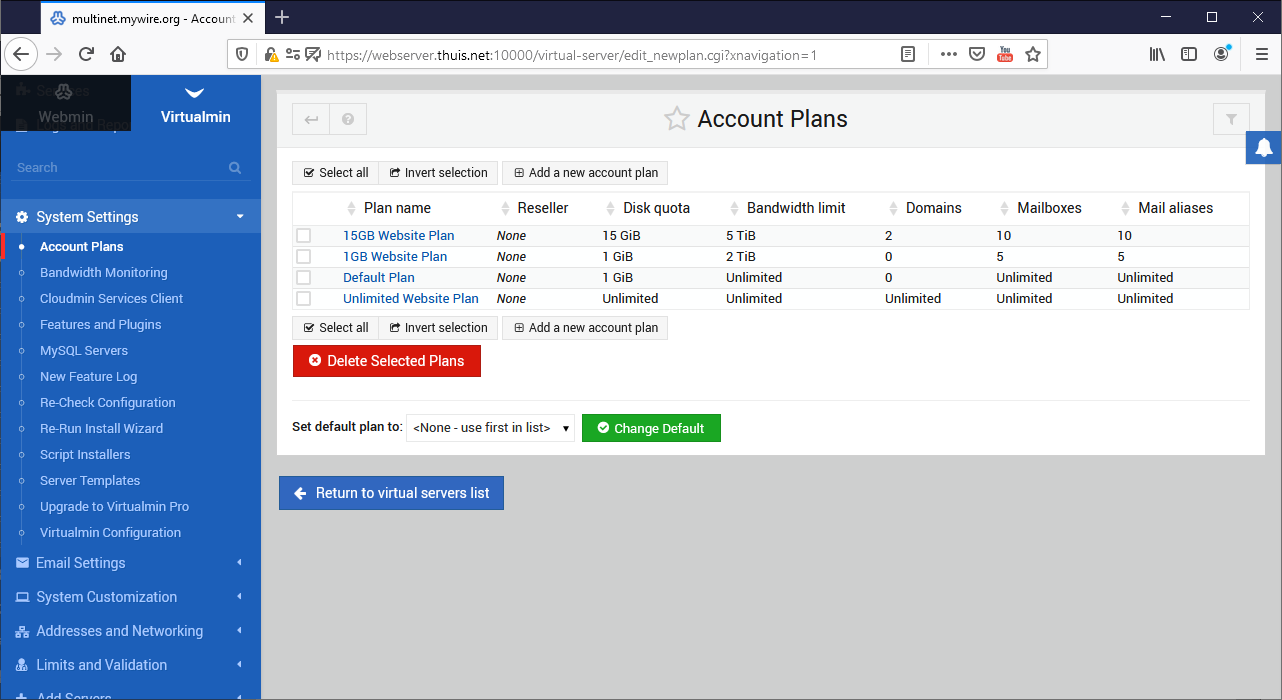
We have now created three account plans, but of course you can create as many as you want.
Postfix Mail Server settings.
Actually, we also have to make sure that the Postfix Mail Server can also send mails, but here it is, because we run the mail server at home on a normal internet connection, a bit of a problem. In most cases, your ISP will have taken measures to prevent the mail server from sending mail directly from your home. In that case you can only send mails via a mail server of your ISP, and that is only possible from the domain of your ISP and not from your own domain. A separate article is devoted to how you can solve this.
Setup a Default redirect.
When a visitor has entered the domain name of our site in the web browser and is forwarded from the internet to the server, the server must ensure that he ends up on the correct virtual host (web site). But what if a visitor comes to our site in a different way, e.g. because he mistakenly entered a non-existent sub-domain of our domain in his browser, or perhaps used our external IP address? In that case the web server does not know what to do with the request and the visitor ends up more or less randomly on one of the domains that is hosted on our server.
Of course we want to prevent that. That is why we are going to ensure that the visitor ends up on a specific web page that we have defined ourselves, and is shown an error message or is possibly forwarded from there to a domain determined by us.
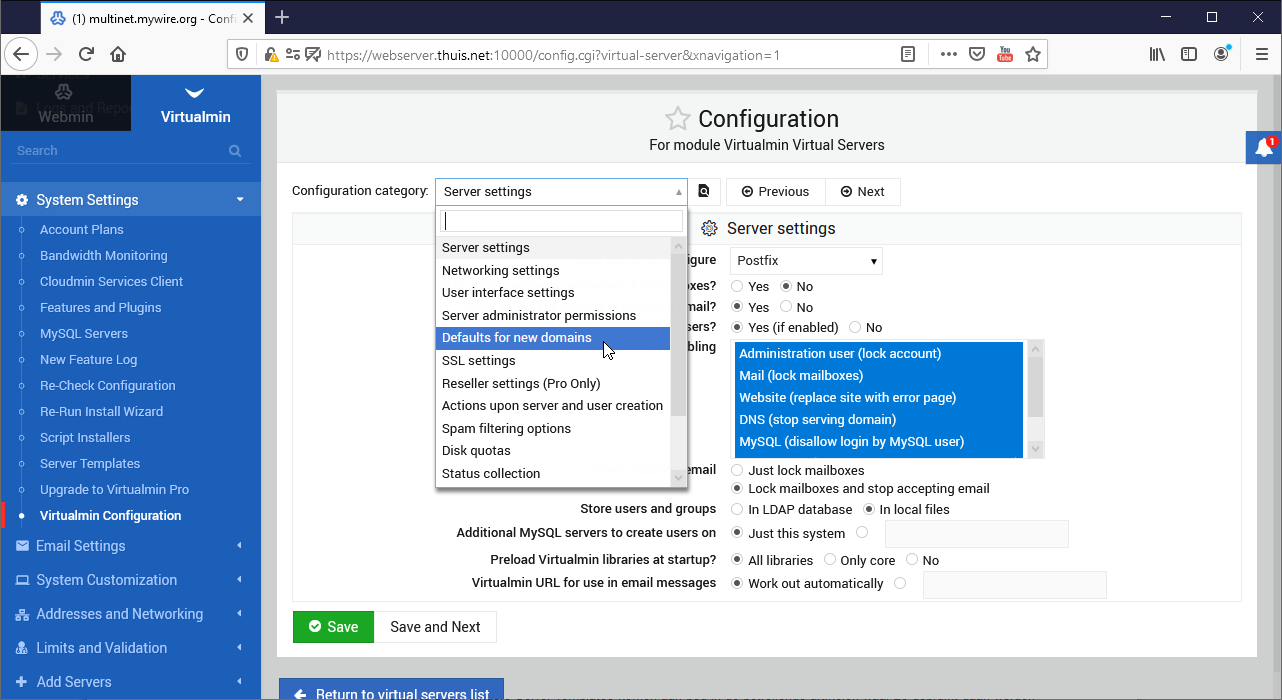
Default Virtual Server Address.
But before we do that, we will first adjust one more thing. After Virtualmin is installed by default, when creating a new site, the SSL connection (HTTPS) for the site will be linked to the IP address of the server. In practice, this can sometimes behave unpredictably when the visitor to the site has entered the IP address in the browser instead of the domain name. That is why we will make sure that this is always linked to “*” (any address).
- In the virtualmin screen go to “System Settings” ==> Virtualmin Configuration.
- In the drop-down box, choose “Defaults for new domains”.
- At “Address format for Apache virtual hosts” choose “Allways use *”.
- Click on “Save”.
Make the Default vhost active.
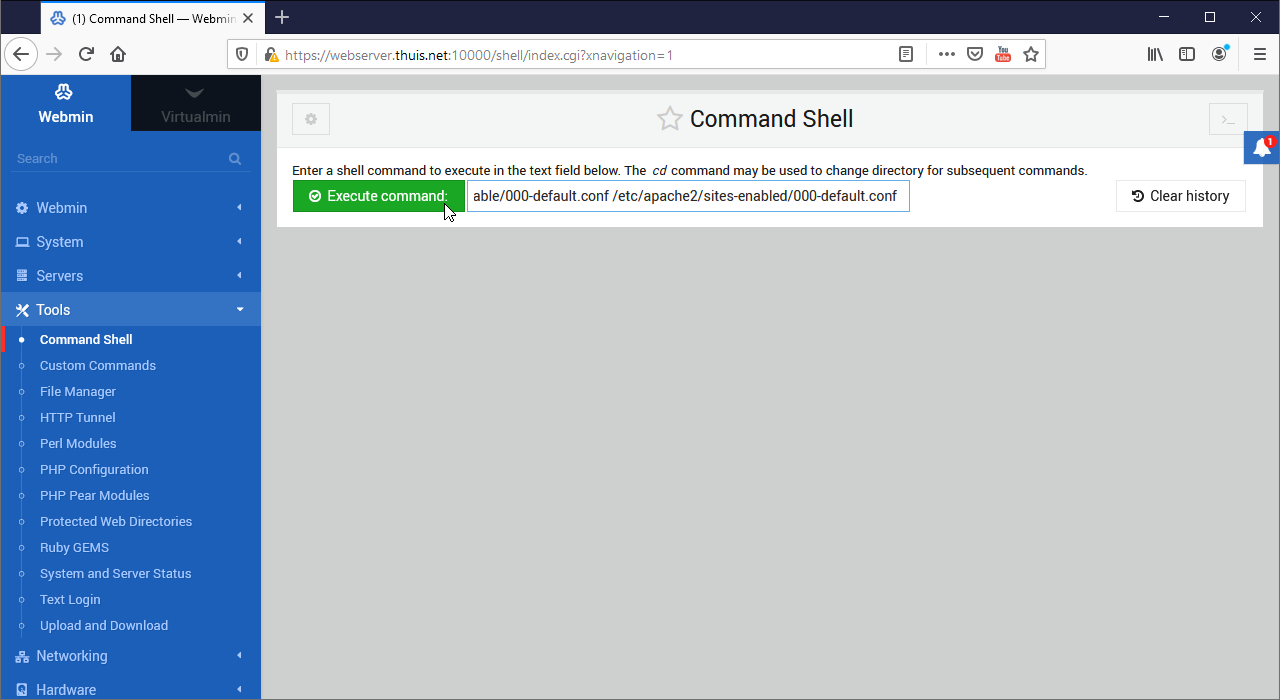
In the example below we are going to ensure that, when the visitor has entered via an incorrect URL or an IP address, in such a case he will end up on the example web page that was installed when our server was created. This page is called “index.html” and is located in the directory “/var/www/html/”. We will also modify that page afterwards.
There are already two files available for this purpose in the directory “/etc/apache2/sites-available/”. One file, named “000-default.conf”, ensures that visitors arriving with HTTP on IP port 80 will be presented with the page “index.html” from the directory “/var/www/html/”. The other file, named “default-ssl.conf” does the same for visitors who come in with HTTPS on IP port 443. All we need to do is activate this by creating symbolic links to both of these files in directory “/etc/apache2/sites-enabled/”. You can easily do this within Virtualmin as follows:
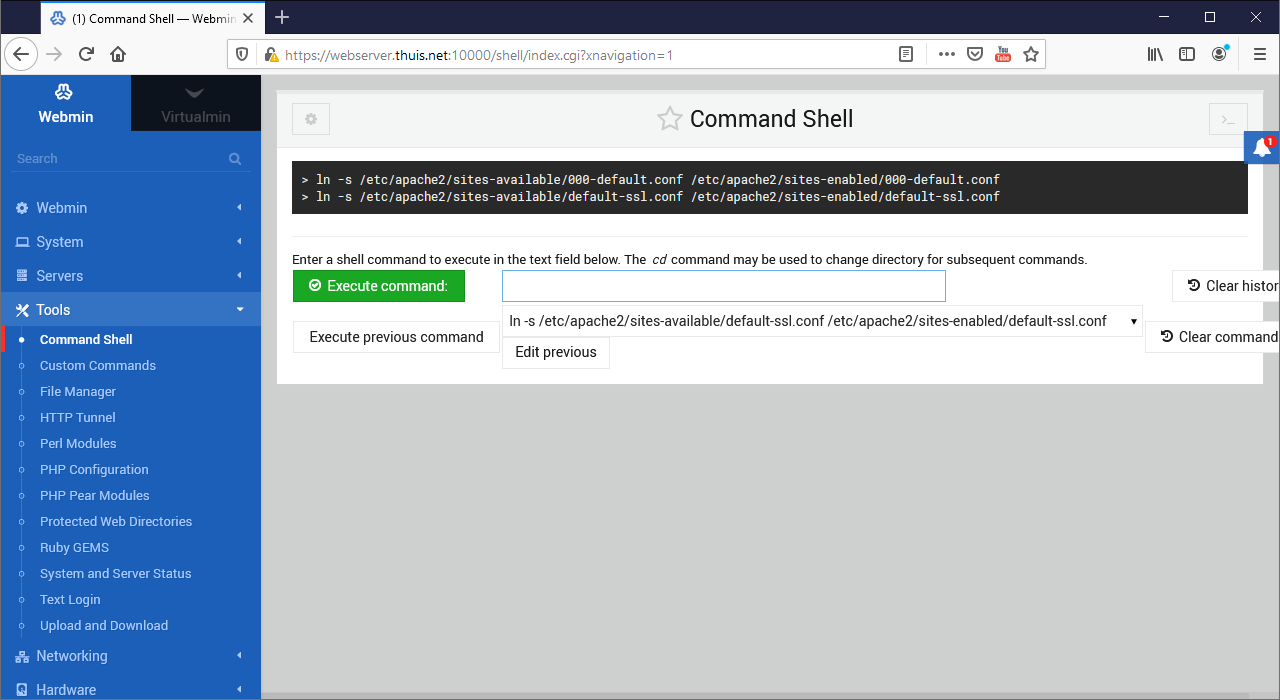
- In the Webmin screen go to “Tools” ==> "Command shell".
- To create the first symbolic link, enter the command below (all on one line) in the input field:
ln -s /etc/apache2/sites-available/000-default.conf /etc/apache2/sites-enabled/000-default.conf - Click on the “Execute command” button.
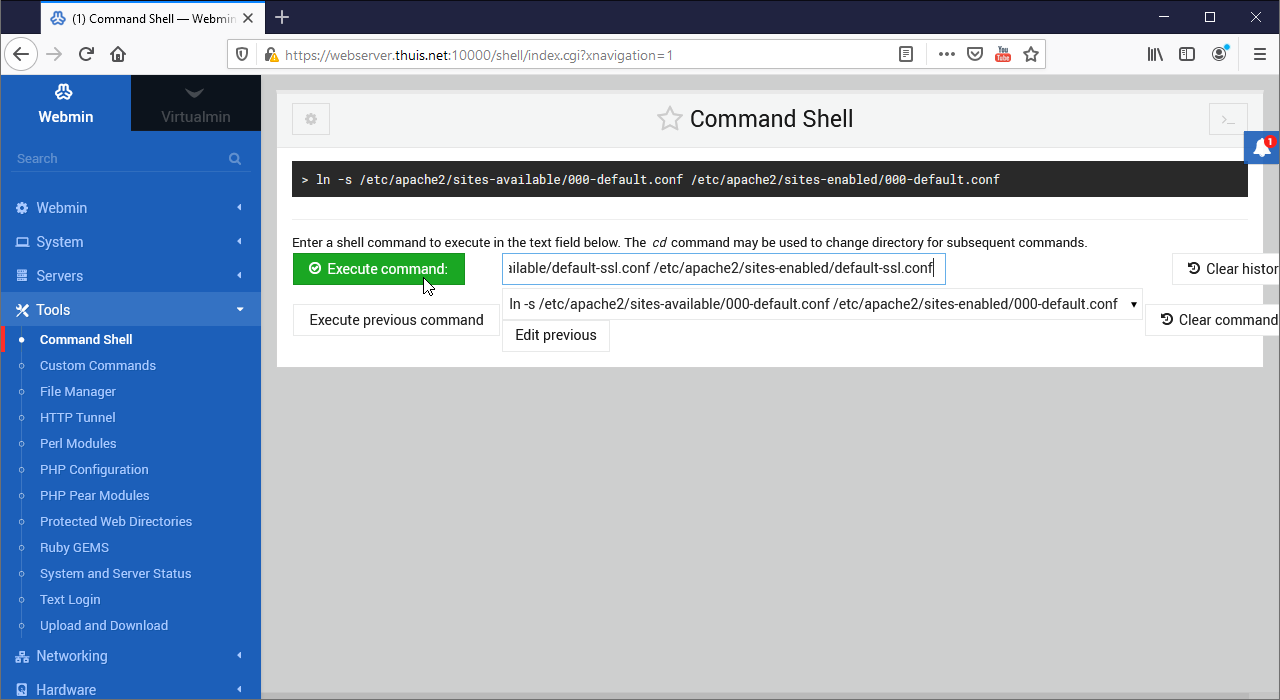
- To create the second symbolic link, enter the command below (all on one line) in the input field:
ln -s /etc/apache2/sites-available/default-ssl.conf /etc/apache2/sites-enabled/default-ssl.conf - Click on the “Execute command” button.
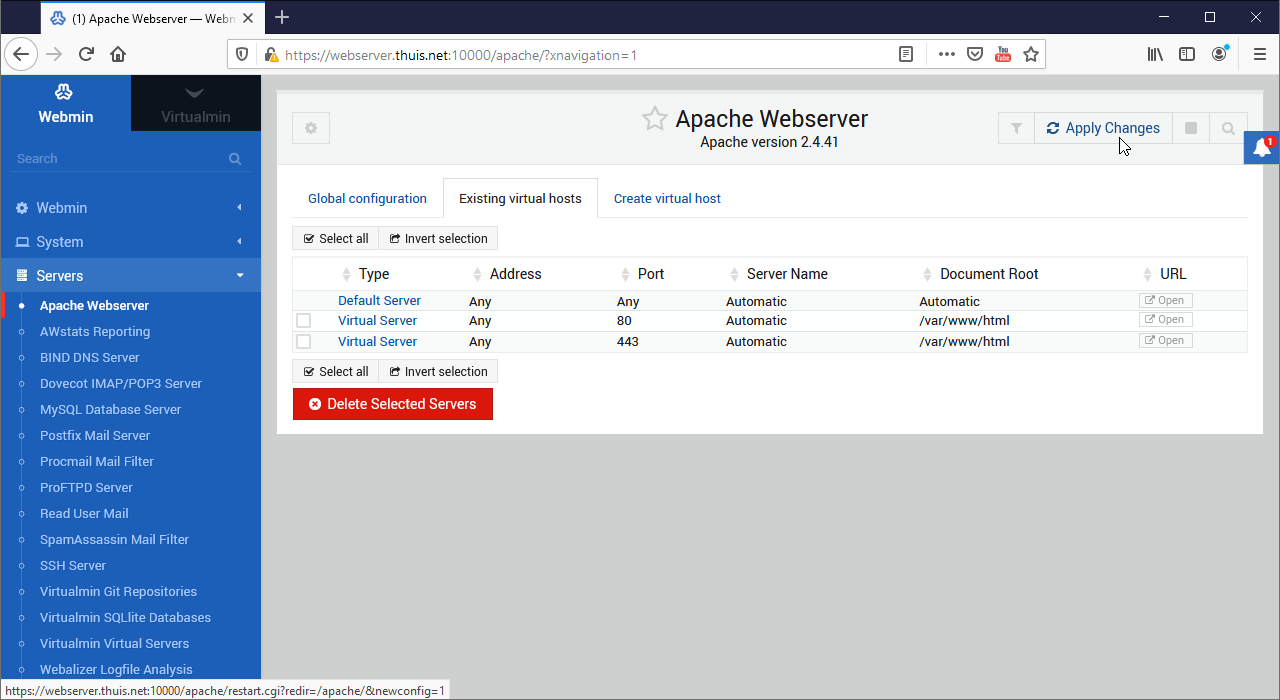
- In the Webmin screen go to “Servers” ==> "Apache Webserver" and click on the "Apply Changes" button at the top right of the screen.
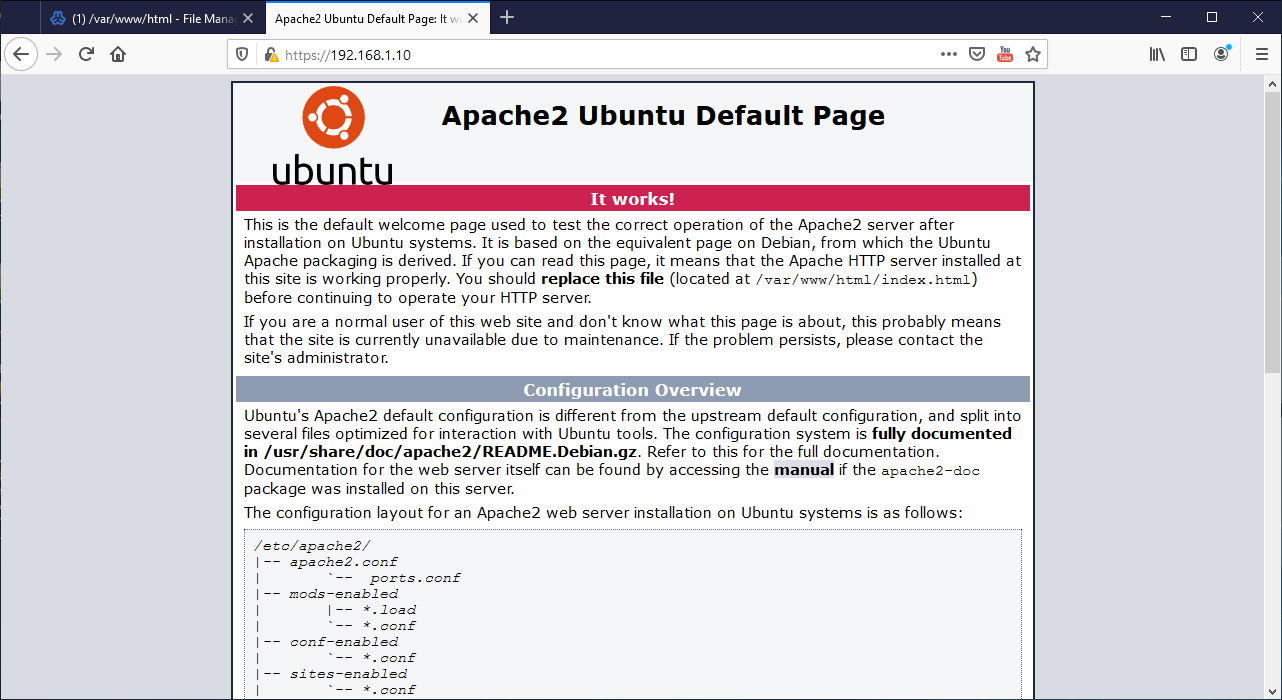
Visitors who incorrectly connect to our server will now see the “Apache2 Ubuntu Default Page”. You could choose to replace this page with your own page, or you might want to redirect the visitor to another domain.
Your own default page.
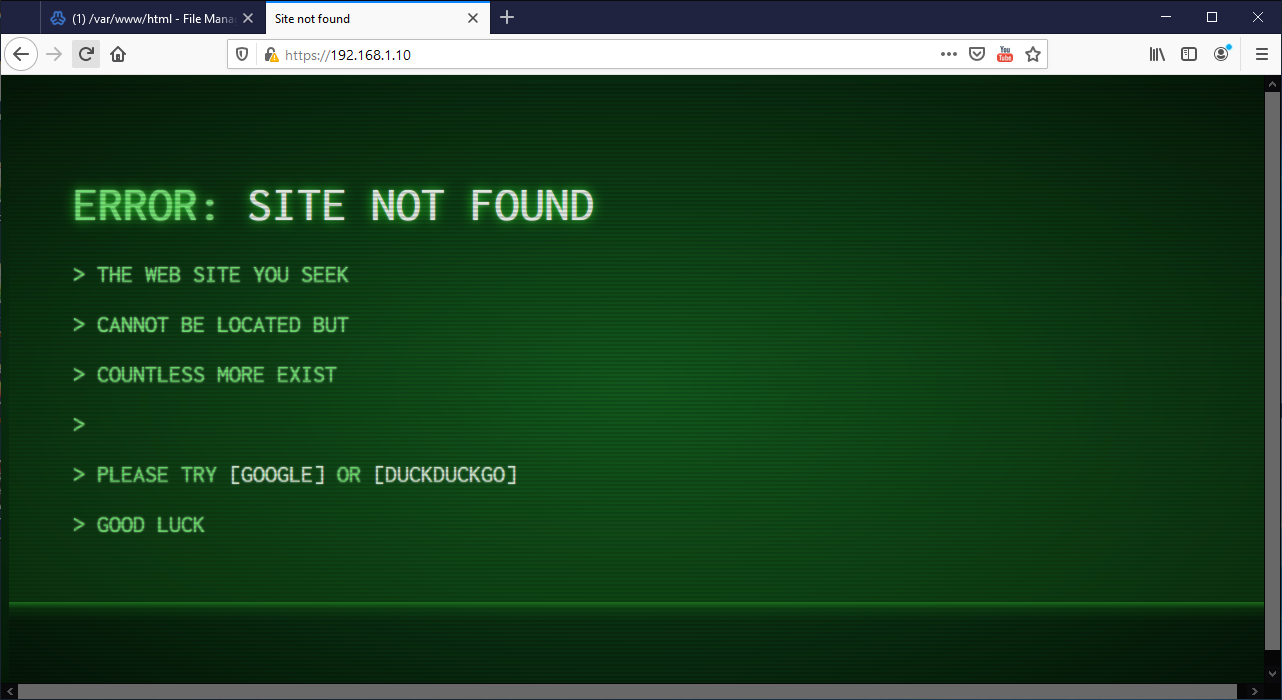
First of all you must of course have the html file that you want to use as the default page. How you get such a file or how you make it yourself is beyond the scope of this story, but in this example I assume that you have this file. You can also download index.zip here.This zip file contains an example index.html. You can see which default page is currently active by going to the IP address of your server with your web browser, e.g. https://192.168.1.10/. We are now going to adjust that default page. Have the new index.html file ready.
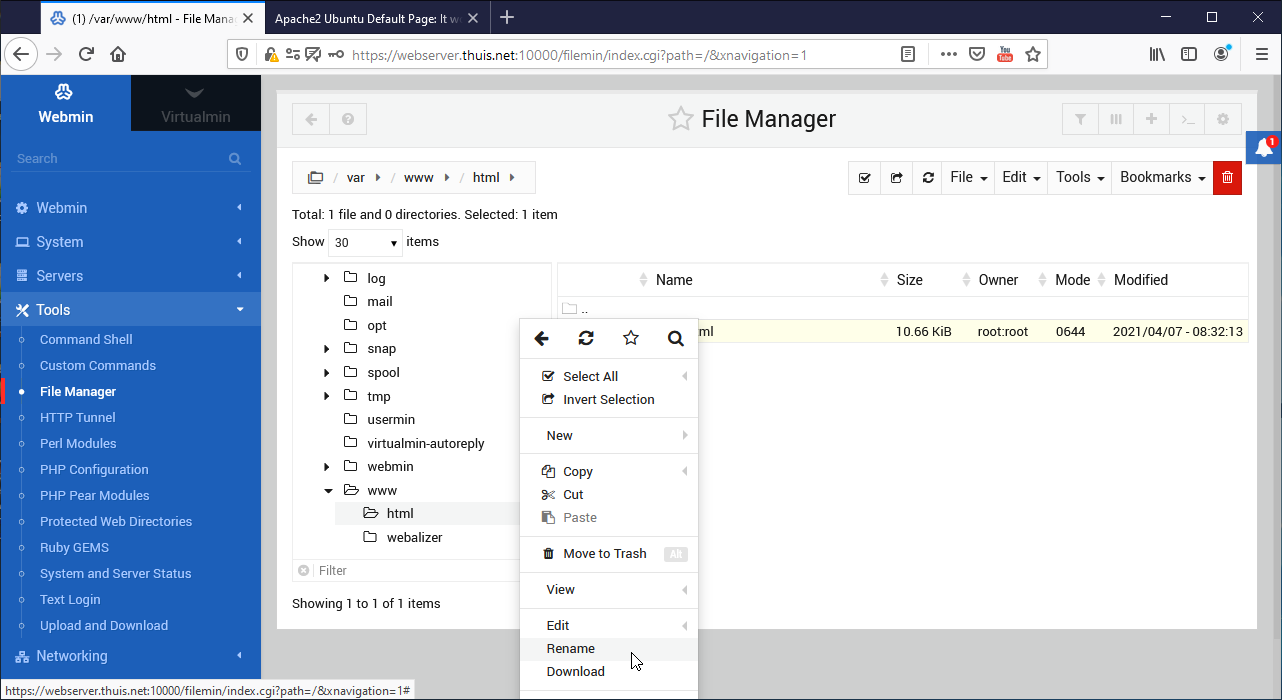
- In the Webmin screen go to “Tools” ==> “File Manager”.
- In the File Manager, navigate to “/var/www/html/”.
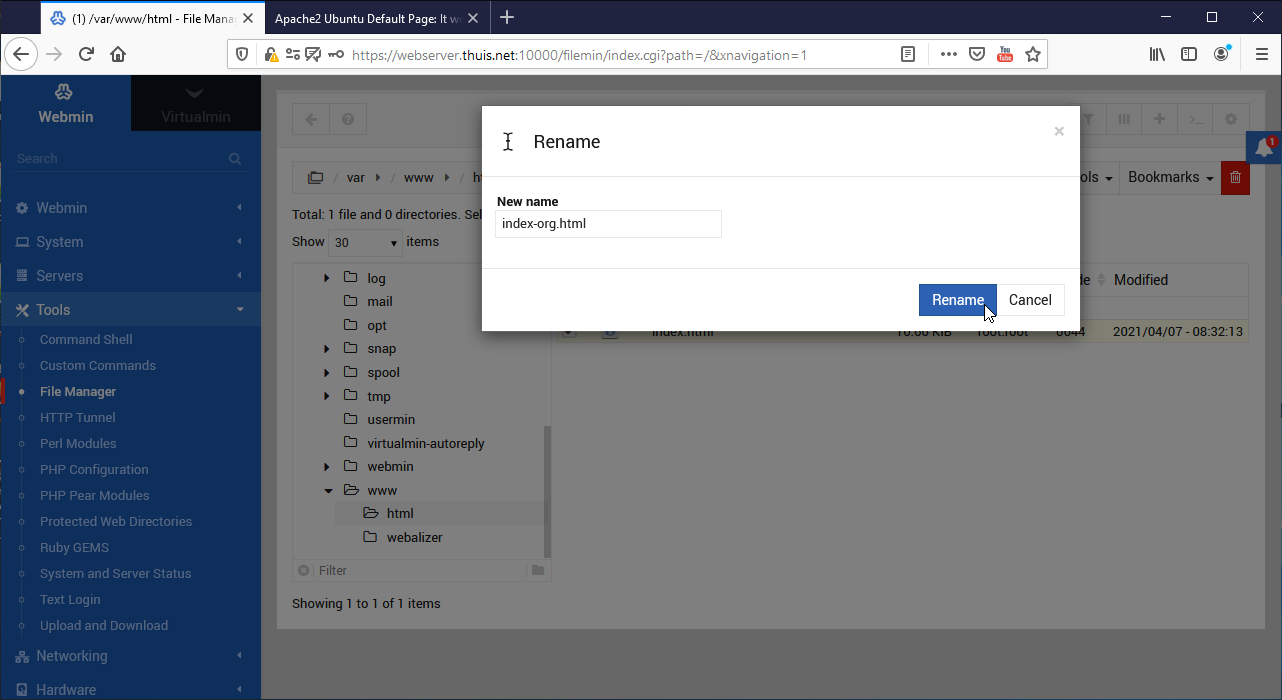
- Right click on the index.html file and select “Rename”.
- Change the name to “index-org.html” and click the “Rename” button.
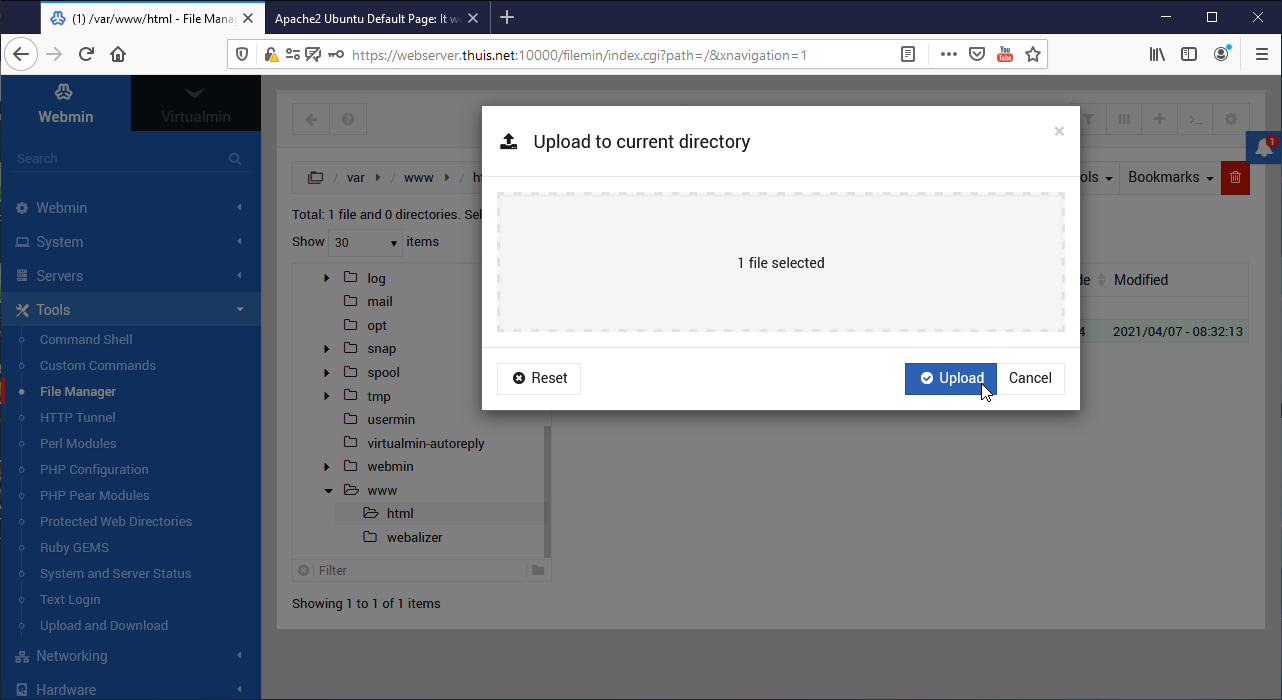
- Click on “File” in the menu at the top right and choose “Upload to current directory”.
- Drag the new index.html file from the Windows File Manager and drop it in the upload box.
- Click on the “Upload” button.

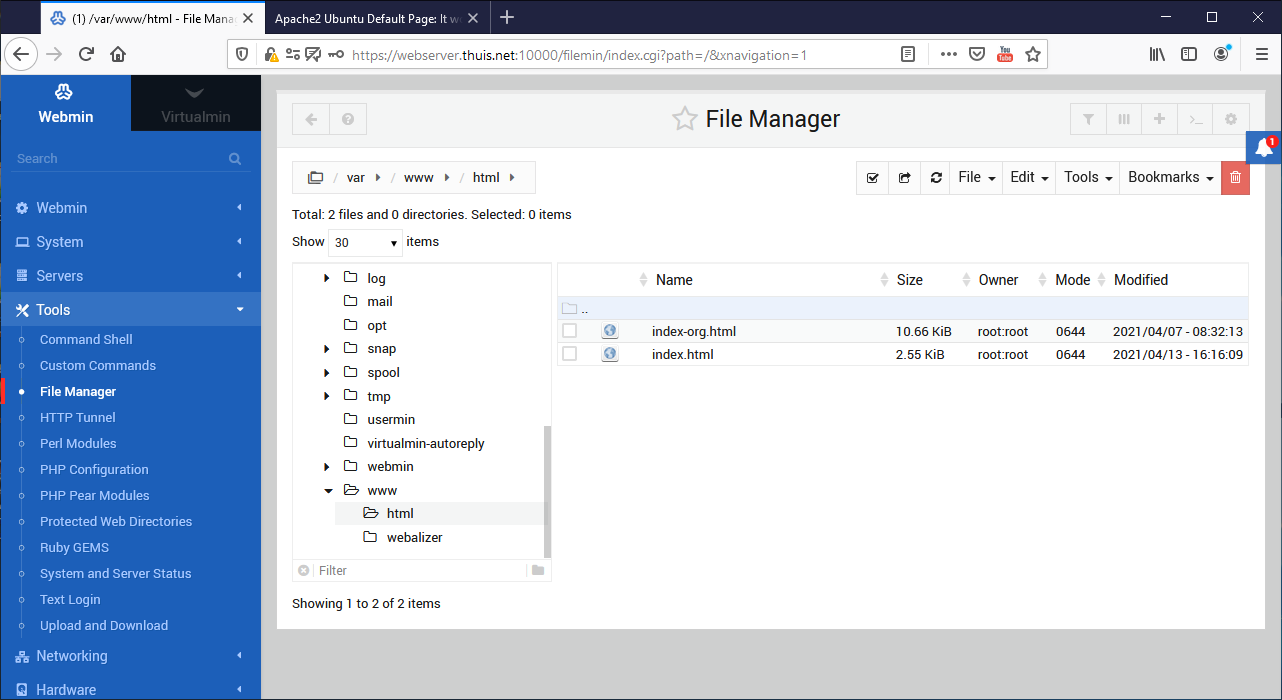
Your new default web page is now operational.
The next step is to create and start using your first virtual host. That will be discussed in the following article.